Classes & Evolution
Overview
Eden MU features all Season 21 classes. Each class progresses through 5 quest-based evolution stages, unlocking new skills and abilities at each tier.
Available Classes
| Class | Role | Style |
|---|---|---|
| Dark Knight | Melee DPS / Tank | Close-range physical combat |
| Dark Wizard | Ranged DPS | AoE magic damage |
| Fairy Elf | Support / Ranged | Buffs, heals, and bow attacks |
| Magic Gladiator | Hybrid DPS | Melee + magic combination |
| Dark Lord | Summoner / Tank | Pets, command auras, support |
| Summoner | Caster DPS | Curse and summon magic |
| Rage Fighter | Melee DPS | Fast combo-based attacks |
| Grow Lancer | Melee DPS | Lance-wielding warrior |
| Rune Wizard | Ranged DPS | Rune-based magic attacks |
| Slayer | Melee DPS | Dual-wielding assassin |
| Gun Crusher | Ranged DPS | Firearm specialist |
| Light Wizard | Support / DPS | Light magic and healing |
| Lemuria | Caster DPS | Elemental magic |
| Illusion Knight | Melee DPS | Illusion-based combat |
| Crusader | Melee / Support | Holy combat and blessings |
| Alchemist | Support / DPS | Potion crafting and buffs |
Evolution Paths
| Base Class | 1st Class | 2nd Class | 3rd Class | 4th Class | 5th Class |
|---|---|---|---|---|---|
| Dark Wizard | Soul Master | Grand Master | Soul Wizard | Arch Wizard | High Wizard |
| Dark Knight | Blade Knight | Blade Master | Dragon Knight | Grand Knight | High Knight |
| Fairy Elf | Muse Elf | High Elf | Noble Elf | Arch Elf | High Elf Master |
| Magic Gladiator | - | Duel Master | Magic Knight | Arch Knight | High Duel Master |
| Dark Lord | - | Lord Emperor | Empire Lord | Force Emperor | High Lord |
| Summoner | Bloody Summoner | Dimension Master | Dimension Summoner | Arch Summoner | High Summoner |
| Rage Fighter | Fist Master | Fist Blazer | Bloody Fighter | Arch Fighter | High Fighter |
| Grow Lancer | Mirage Lancer | Shining Lancer | Trinity Lancer | Arch Lancer | High Lancer |
| Rune Wizard | Rune Spell Master | Grand Rune Master | Rune Spell Caster | Arch Rune Wizard | High Rune Wizard |
| Slayer | Royal Slayer | Master Slayer | Slaughterer | Arch Slayer | High Slayer |
| Gun Crusher | Gun Breaker | Master Gun Breaker | Heist Gun Crusher | Arch Gun Crusher | High Gun Crusher |
| Light Wizard | Light Master | Shining Wizard | Luminous Wizard | Arch Light Wizard | High Light Wizard |
| Lemuria | Arcana | Mystic | Elemental Mystic | Arch Lemuria | High Lemuria |
| Illusion Knight | Mirage Knight | Illusion Master | Mystic Knight | Arch Illusion Knight | High Illusion Knight |
| Alchemist | Alchemic Magician | Alchemic Master | Grand Alchemist | Arch Alchemist | High Alchemist |
| Crusader | Impact Crusader | Master Paladin | Sacred Paladin | Arch Crusader | High Crusader |
Class Evolution Quests
1st Class (Level 150)
NPC: Sebina the Priest - Devias
- Quest 1: "Locate the Scroll of the Emperor!"
- Quest 2: "The Three Treasures of Mu"
Classes: DW, DK, FE, SU, RW, SL, GC, LM, IK, AL, CS
Note: MG, DL, RF, GL start at 1st class - no quest needed.
2nd Class (Level 220)
NPC: Head Priest Devin - Devias
- Quest 3: "Achieve Hero Status!"
- Quest 4: "Secret of the Dark Stone" (DK, GL, SL only)
Classes: DW, DK, FE, SU, RW, SL, GC, LM, IK, AL, CS
3rd Class (Level 380-400)
NPC: Apostle Devin - Crywolf (228, 48)
- Quest 5: "Prove Your Strength" (Level 380)
- Quest 6: "Infiltrate the Barracks of Balgass" (Level 400)
- Quest 7: "Into the Realm of Darkness" (Level 400)
Classes: All classes
4th Class (Level 800)
NPC: Cent - Lorencia (131, 147)
- Quest 8: "4th Class Upgrade - Eligibility Test" - Defeat Cent in the Deep Dungeon arena
- Quest 9: "4th Class Upgrade - New Battle (1)" - Survive and kill Deep Dungeon monsters within the time limit
- Quest 10: "4th Class Upgrade - New Battle (2)" - Defeat a powered-up Cent alongside Deep Dungeon monsters
Classes: All classes | Min entry level: 750
5th Class (Level 1200)
NPC: Eunice - Devias (193, 11)
- Quest 11: "5th Class Up - New Power Nuke"
- Quest 12: "5th Class Up - New Power Bolt"
- Quest 13: "5th Class Up - New Power AoE"
- Quest 14: "5th Class Up - Giant Mount (1)"
- Quest 15: "5th Class Up - Giant Mount (2)"
Classes: All classes
Stats & Attributes
Overview
Every level grants 3 stat points to distribute among the four core attributes (Dark Lord gets 4 due to the Command stat). Resets grant 120 bonus stat points (50 for Dark Lord). With 100 resets at level 400, you reach max stats.
Core Attributes
| Stat | Effect | Best For |
|---|---|---|
| Strength (STR) | Physical damage, equipment requirements | Dark Knight, Rage Fighter, Grow Lancer |
| Agility (AGI) | Attack speed, defense rate, block chance | Fairy Elf, Slayer |
| Vitality (VIT) | HP, survivability | All classes (PvP builds) |
| Energy (ENE) | Mana, skill power, buff duration | Dark Wizard, Summoner, Rune Wizard |
Stat Point Sources
- Leveling - 3 points per level (4 for Dark Lord)
- Resets - 120 bonus points per reset (50 for Dark Lord)
- Fruits - Stat fruits add permanent points
Currency Guide
Overview
Eden MU has four main currencies, each serving different purposes.
Zen
- Primary in-game currency
- Earned from hunting monsters and selling items
- Tradeable between players
- Used for: item repairs, upgrades, NPC purchases, reset costs, event entry fees
Ruud
- Earned from: PvE events (Blood Castle, Chaos Castle, Devil Square, Illusion Temple), World Boss rewards (top-damage + participation), endgame boss drops and Ruud Boxes, and resets.
- Spent at Priest James (Ruud Shop): tier-upgrade anvils and souls (Bloodangel up to Imperial), earring materials, Wing Core materials, Guardian materials, class skill orbs, and more.
WCoin
- Earned from: daily voting on every vote site (WCoin per vote, every 12h per site), donations, and special events.
- Spent in the in-game Cash Shop: VIP tiers, wings and capes, EXP/drop seals, Muun pets, Magic Backpack and Vault expansions, keys, and elite consumables.
- Beta voters who re-register with the same email at launch receive a WCoin thank-you bonus automatically.
Goblin Points
- Earned from resets and special activities
- Used in the Cash Item Shop alongside WCoins
Starter Ancient Drops
Overview
Regular monsters across the leveling maps drop class-appropriate Ancient gear and weapons. Every drop is Excellent and fully tradeable, so you can equip what you find or pass it to a guildmate. Each map drops gear scaled to its monster levels, giving you a clear progression path from Lorencia all the way to Aida.
Sets drop as individual pieces (Helm, Armor, Pants, Gloves, Boots) so you can complete a set across multiple kills. Weapons drop separately. Hunt in the map that matches your level for the gear tier suited to your character.
Drop Quality & Odds
Every starter Ancient rolls random enhancement and Excellent options, so no two drops are alike:
- Enhancement: random +8 to +11.
- Excellent options: 2 to 6 options, weighted so more options are rarer.
- Drop chance: roughly 0.5% per eligible item on each kill. Only gear for your class can roll, so an Elf only sees Elf sets and bows.
- One per kill: a kill drops at most one Ancient.
| Excellent Options | Chance |
|---|---|
| 2 options | 50% |
| 3 options | 25% |
| 4 options | 15% |
| 5 options | 8% |
| 6 options | 2% |
Pity System
Bad luck is capped. Kill 80 eligible monsters with no Ancient and the next kill is guaranteed to drop one. Any drop, lucky or guaranteed, resets the counter. It is tracked per character across all maps.
Tier 1: Beginner Maps (Levels 1-50)
Lorencia
Drops from: Lich, Giant, Skeleton
Sets: Pad (DW/MG), Leather (DK/MG/DL/RF), Vine (FE), Bronze (DK/MG/DL), Silk (FE), Bone (DW/MG), Scale (DK/MG/DL/RF), Sphinx (DW/MG), Violent Wind (SU), Robust (GL), Rune Pad (RW), Slayer Red Wing (SL), Mage Pad (LM), Glimmer (KM), IK Scale (IK), Alchemist Spirit (AL), Crusader Leather (CS), Leather Gun Crusher (GC)
Weapons: Skull Staff, Mace, Bow, Lapid Lance, Flat Short Sword, Floor Hammer, Royal Orb, Red Eye Wand, Entro Magic Gun
Noria
Drops from: Elite Goblin, Beetle Monster, Hunter, Forest Monster
Sets: Pad (DW/MG), Leather (DK/MG/DL/RF), Vine (FE), Bronze (DK/MG/DL), Silk (FE), Bone (DW/MG), Robust (GL), Rune Pad (RW), Slayer Red Wing (SL), Mage Pad (LM), IK Scale (IK), Crusader Leather (CS), Leather Gun Crusher (GC)
Weapons: Skull Staff, Mace, Bow, Lapid Lance, Flat Short Sword, Floor Hammer
Dungeon
Drops from: Larva, Cyclops, Ghost, Skeleton Archer, Hell Hound
Sets: Sphinx (DW/MG), Brass (DK/RF), Wind (FE), Spirit (FE), Plate (DK/MG/RF), Light Plate (DL), Red Wing (SU), Gru Hill (GL), Rune Sphinx (RW), Slayer Ancient (SL), Mage Sphinx (LM), Light Ray (KM), IK Iron Plate (IK), Alchemist Holy Spirit (AL), Crusader Brass (CS), Scale Gun Crusher (GC), Legendary (DW/MG)
Weapons: Angelic Staff, Battle Axe, Battle Bow, Sword of Salamander, Flail, Great Hammer, Prickle Lance, Serpent Staff, Falchion, Royal Orb, Red Eye Wand, Entro Magic Gun, Floor Hammer
Devias
Drops from: Ice Monster, Hommerd, Assassin, Yeti, Elite Yeti
Sets: Sphinx (DW/MG), Brass (DK/RF), Scale (DK/MG/DL/RF), Wind (FE), Bronze (DK/MG/DL), Violent Wind (SU), Robust (GL), Rune Sphinx (RW), Slayer Ancient (SL), Mage Sphinx (LM), Glimmer (KM), IK Scale (IK), Alchemist Spirit (AL), Crusader Brass (CS), Scale Gun Crusher (GC)
Weapons: Angelic Staff, Elven Axe, Battle Bow, Gladius, Flail, Spear, Prickle Lance, Falchion, Royal Orb, Red Eye Wand, Entro Magic Gun, Floor Hammer
Tier 2: Mid-Level Maps (Levels 50-110)
Lost Tower
Drops from: Shadow, Poison Shadow, Cursed Wizard, Death Cow, Devil, Death Knight
Sets: Legendary (DW/MG), Plate (DK/MG/RF), Spirit (FE), Guardian (FE), Light Plate (DL), Red Wing (SU), Gru Hill (GL), Rune Legendary (RW), Slayer Ancient (SL), Mage Legendary (LM), Light Ray (KM), IK Iron Plate (IK), Alchemist Holy Spirit (AL), Crusader Plate (CS), Light Plate Gun Crusher (GC)
Weapons: Thunder Staff, Light Saber, Tiger Bow, Legendary Sword, Larkan Axe, Great Hammer, Light Spear, Myotis Orb, Benitoite Wand, Double Blade, Silver Blade, Conspired Hammer
Atlans
Drops from: Vepar, Valkyrie, Great Bahamut, Silver Valkyrie, Lizard King
Sets: Legendary (DW/MG), Plate (DK/MG/RF), Spirit (FE), Light Plate (DL), Red Wing (SU), Gru Hill (GL), Rune Legendary (RW), Slayer Ancient (SL), Mage Legendary (LM), Light Ray (KM), IK Iron Plate (IK), Alchemist Holy Spirit (AL), Crusader Plate (CS), Light Plate Gun Crusher (GC)
Weapons: Thunder Staff, Light Saber, Tiger Bow, Legendary Sword, Larkan Axe, Serpent Spear, Serpent Crossbow, Myotis Orb, Benitoite Wand, Silver Blade, Conspired Hammer
Tarkan
Drops from: Mutant, Bloody Wolf, Iron Wheel, Tantalos, Beam Knight, Zaikan
Sets: Eclipse (DW/MG), Black Dragon (DK/MG), Iris (FE), Adamantine (DL), Ancient (SU), Piercing Groove (RF), Princie (GL), Kenaz (RW), Slayer Demonic (SL), Flash (KM), Noble Pixie (LM), Steel Plate (IK), Alchemist Red Spirit (AL), Frere (GC), Solid (CS)
Weapons: Thunder Staff, Legendary Sword, Tiger Bow, Larkan Axe, Serpent Spear, Double Blade, Silver Blade, Conspired Hammer
Icarus
Drops from: Alquamos, Mega Crust, Queen Rainier, Drakan, Alpha Crust, Phantom Knight
Sets: Grand Soul (DW/MG), Dark Phoenix (DK/MG), Holy Spirit (FE), Dark Steel (DL), Demonic (SU), Piercing Groove (RF), Hirat (GL), Kenaz (RW), Nightwing (SL), Magic Flare (KM), Noble Pixie (LM), Black Origin (IK), Radiant (AL), Frere (GC), Solid (CS)
Weapons: Thunder Staff, Legendary Sword, Serpent Crossbow, Larkan Axe, Double Blade, Silver Blade, Myotis Orb, Benitoite Wand, Conspired Hammer
Aida
Drops from: Forest Orc, Death Rider, Blue Golem, Witch Queen
Sets: Grand Soul (DW/MG), Dark Phoenix (DK/MG), Red Spirit (FE), Dark Steel (DL), Demonic (SU), Piercing Groove (RF), Sate (GL), Kenaz (RW), Nightwing (SL), Magic Flare (KM), Noble Pixie (LM), Black Origin (IK), Radiant (AL), Frere (GC), Solid (CS)
Weapons: Thunder Staff, Legendary Sword, Serpent Crossbow, Double Blade, Silver Blade, Myotis Orb, Benitoite Wand, Conspired Hammer
Notes
- All drops roll with Excellent options. They are not Bound, so you can trade, sell, or upgrade them like any normal Ancient.
- Sets drop piece by piece. Keep farming the same map to complete the 5-piece set bonus for your class.
- Class abbreviations: DW Dark Wizard, DK Dark Knight, FE Fairy Elf, MG Magic Gladiator, DL Dark Lord, SU Summoner, RF Rage Fighter, GL Grow Lancer, RW Rune Wizard, SL Slayer, GC Gun Crusher, KM Kundun Mage, LM Lemuria Mage, IK Illusion Knight, AL Alchemist, CS Crusader.
- Move up to the next map once your level matches the target tier. Higher-tier maps drop higher-level Ancient sets that scale with your character.
Excellent Rings & Pendants
Elemental accessories drop as Excellent items from monsters, so you never have to go without a ring or pendant:
- While leveling: the six elemental rings (Ice, Poison, Fire, Earth, Wind, Magic) drop on the Ancient-drop leveling maps at +0 to +3, occasionally with one Excellent option. Any class can pick them up.
- Endgame: the full set (all six rings plus the six pendants: Lightning, Fire, Ice, Wind, Water, Ability) drops on the endgame maps (Atlans Abyss and above) at +4 to +9 with 1-2 Excellent options. A pity counter guarantees one within a few hundred kills.
Excellent accessory options include Damage Decrease, Damage Reflect, Increase Zen, Increase Max HP/Mana, and Defense Success Rate.
Master Level System
Overview
The Master Level system is the endgame progression path. After reaching level 400 and completing your 3rd class evolution, you unlock a separate Master Level track with its own skill tree.
How to Unlock
- Reach level 400
- Complete 3rd Class Quest at Apostle Devin in Crywolf
- Master Levels begin progressing alongside your normal level
Where to Earn Master XP
Master experience comes from killing monsters, but only monsters at or above a minimum level count. It is not tied to a specific map, so any qualifying monster anywhere grants Master XP.
- Master XP: monsters level 95 and above.
- Enhanced (Majestic) XP: monsters level 160 and above.
Where Master XP begins (95+)
Icarus, Aida, Kalima 4-7, Land of Trials, Kanturu, Crywolf, Karutan, Vulcanus, Acheron, Deventer, Swamp of Calmness, Raklion, and every map above them. Lower maps (Lorencia through Lost Tower and Tarkan) have monsters below level 95 and grant no Master XP.
Enhanced tier (160+)
Deep Dungeon, Nixies Lake, and the endgame chain (Cubera Mine, Atlans Abyss, Scorched Canyon and beyond), where monster levels climb well past 160.
Master Skill Tree
- Separate skill tree with powerful endgame abilities
- Each Master Level grants skill points to invest
- Skills are unique to each class
- Can reset Master Skills using Scroll of Oblivion (purchased with Ruud)
Item Upgrade (+0 to +15)
Overview
Items can be upgraded from +0 to +15, significantly increasing their stats at each level. Higher upgrade levels make a massive difference in combat power. Items with Luck have +25% success chance on all upgrades and +5% critical hit chance.
Upgrade Methods
| Level Range | Method | Success Rate | On Failure |
|---|---|---|---|
| +0 to +6 | Jewel of Bless | 100% | N/A |
| +0 to +9 | Jewel of Soul | 70% (95% with Luck) | Drops 1 level (+0-7), resets to 0 (+8-9) |
| +10 to +15 | Special Jewels (guaranteed success) | 100% | N/A |
| +10 to +15 | Chaos Machine (Chaos Goblin NPC) | 40-60% | Item may be destroyed |
Chaos Machine Materials (+10 to +15)
| Target | Jewel of Chaos | Jewel of Bless | Jewel of Soul |
|---|---|---|---|
| +10 | 1 | 1 | 1 |
| +11 | 1 | 2 | 2 |
| +12 | 1 | 3 | 3 |
| +13 | 1 | 4 | 4 |
| +14 | 1 | 5 | 5 |
| +15 | 1 | 6 | 6 |
Visual Effects
- +3 to +4 - Dark red tint
- +5 to +6 - Dark blue tint
- +7 to +9 - Glowing effects appear
Excellent Options
Overview
Excellent items are special grade equipment with bonus stat options. They have a pink-colored name and provide significant advantages over normal items.
Weapon Options
- Excellent Damage Chance - % chance to deal increased damage
- Increase Damage +level/20 - Bonus damage scaling with level
- Increase Speed - Faster attack speed
- Life Leech - Recover HP per hit
- Mana Leech - Recover MP per hit
- Excellent Damage Rate - Increased critical damage
Armor Options
- Increase Max HP - Bonus maximum HP
- Increase Max Mana - Bonus maximum MP
- Damage Decrease - Flat damage reduction
- Damage Reflect - Reflect damage to attacker
- Defense Success Rate - Higher dodge chance
- Increase Zen Drop - More Zen from monsters
How to Obtain
- Monster drops (rare chance in high-level maps)
- Chaos Machine combinations
- Event rewards
Attack Speed & Item Tiers
Overview
On Eden, attack and wizardry speed is item-driven. Stats alone can never reach the 1500 cap. Roughly 40% of your speed comes from Agility, the remaining 60% comes from your weapon, gloves, excellent options and accessories. Every gear upgrade is a visible speed gain, and a fully best-in-slot character sits just under the cap.
Where speed comes from
| Source | Max value | Notes |
|---|---|---|
| Agility (class formula) | 379 to 590 | At max Agility (32,706 / 100 resets). Class order is kept, see below. |
| Weapon base speed | up to ~440 (Imperial 418 to 462) | Scales linearly with item tier, see table. |
| Gloves base speed | up to ~120 (Bloodangel 114 to 126) | Scales linearly with item tier. |
| Excellent "Increase Attack (Wizardry) speed" | +100 on weapons | Pets/misc accessories roll +20. |
| Guardian mounts | +35 | Rhino, Leviathan, Tauros, Fierce Lion, Shining Tail, Ur, Phantasmal Steed, Ice Dragon (and Rares). |
| Wings & Cloaks | +25 | Wings of Spirits / Soul / Dragon / Darkness / Despair, Cloak of Innocence, Pitch Black Cloak. |
| Wizard Ring, Lethal Wizard's Ring | +50 | Fixed bonus. |
| Pets, necklaces, rings | +35 or +50 | Growth / Emerald Necklace, Mini Robot Ring +35. Demon, Pet Skeleton, Decoration Ring, Dark Transformation Ring +50. |
Weapon speed by tier
Base speed grows linearly with the weapon's tier level. Within a tier, faster weapon types (quivers, magic guns, rune maces) sit at the top of the range.
| Tier (item level) | Base speed | Example |
|---|---|---|
| Starter (6) | 7 | Kris |
| 50 | 61 | mid-game sword |
| 100 | 116 to 128 | Rune Blade era |
| 150 | 174 to 192 | Bloodangel weapons |
| 200 | 232 to 256 | Divine / Archangel |
| 260 | 302 to 334 | Manticore |
| 300 | 349 to 385 | Apocalypse |
| 340 | 395 to 437 | Temple Guard |
| 360 (max) | 418 to 462 | Imperial (Imperial Quiver 462) |
Glove speed by tier
| Tier (item level) | Base speed |
|---|---|
| 10 | 8 |
| 28 | 22 to 23 |
| 50 | 38 to 42 |
| 100 | 80 |
| 150 (Bloodangel) | 114 to 126 |
Class speed from Agility
Each class keeps its traditional speed identity, compressed into a tight band so nobody is left behind. Values are physical speed at max Agility.
| Classes | Speed from stats | Fully geared (approx.) |
|---|---|---|
| Kundun Mephis, Lemuria (fastest) | 590 | ~1495 |
| Rage Fighter | 556 | ~1461 |
| Dark Lord, Illusion Knight, Alchemist | 511 | ~1416 |
| Dark Knight, Magic Gladiator, Slayer | 467 | ~1372 |
| Dark Wizard, Summoner, Grow Lancer, Rune Wizard, Gun Crusher | 424 | ~1329 |
| Fairy Elf, Crusader | 379 | ~1284 |
"Fully geared" assumes an Imperial weapon, Bloodangel gloves, the excellent speed option on the weapon, and all accessory slots filled (mount, wings, pet, necklace, two rings). No class exceeds the 1500 cap.
Spider Artifacts
How artifacts work
There are 7 Spider Artifact types. Each artifact carries one option rolled from that type’s pool. Its power comes from the grade (1 to 10) of the roll and the enhancement level (+0 to +15). Enhancement carries most of the power, so upgrading matters as much as the grade.
Rarer types are stronger. The harder a type is to obtain, the higher its stats go. Where the same stat appears on more than one type, the rarer type always gives more of it — so a common artifact is never a better choice than a rare one carrying the same option.
Type rarity and power
| Type | Share of artifacts | Best stat at grade 10, +15 |
|---|---|---|
| Type 7. Attack and Curse (Top Tier) | 5% | 2,004 |
| Type 1. Defensive | 10% | 1,699 |
| Type 6. Attack, Wizardry and Curse | 10% | 1,703 |
| Type 2. Core Stats | 15% | 1,403 |
| Type 5. Elemental | 15% | 1,403 |
| Type 3. Offense Utility | 20% | 1,155 |
| Type 4. All-Round Mix | 25% | 899 |
Grade drop chances
| Grade | Chance |
|---|---|
| Grade 1 | 24% |
| Grade 2 | 20% |
| Grade 3 | 16% |
| Grade 4 | 12% |
| Grade 5 | 9% |
| Grade 6 | 7% |
| Grade 7 | 5% |
| Grade 8 | 4% |
| Grade 9 | 2% |
| Grade 10 | 1% |
The tables below list the stat at each grade for enhancement +0, +5, +10 and +15.
Type 1. Defensive — 10% of artifacts
Increase DEF Success Rate, Increase Defense
| Grade | +0 | +5 | +10 | +15 |
|---|---|---|---|---|
| Grade 1 | 21 | 45 | 68 | 92 |
| Grade 2 | 44 | 101 | 157 | 214 |
| Grade 3 | 67 | 162 | 256 | 351 |
| Grade 4 | 90 | 229 | 367 | 505 |
| Grade 5 | 115 | 304 | 494 | 683 |
| Grade 6 | 139 | 381 | 622 | 864 |
| Grade 7 | 163 | 461 | 758 | 1,055 |
| Grade 8 | 187 | 544 | 900 | 1,257 |
| Grade 9 | 213 | 635 | 1,057 | 1,479 |
| Grade 10 | 237 | 725 | 1,212 | 1,699 |
Increase Basic Defense
| Grade | +0 | +5 | +10 | +15 |
|---|---|---|---|---|
| Grade 1 | 21 | 45 | 68 | 92 |
| Grade 2 | 44 | 101 | 157 | 214 |
| Grade 3 | 67 | 162 | 256 | 351 |
| Grade 4 | 90 | 229 | 367 | 505 |
| Grade 5 | 115 | 304 | 494 | 683 |
| Grade 6 | 139 | 381 | 622 | 864 |
| Grade 7 | 163 | 461 | 758 | 1,055 |
| Grade 8 | 187 | 544 | 900 | 1,257 |
| Grade 9 | 213 | 635 | 1,057 | 1,479 |
| Grade 10 | 237 | 725 | 1,212 | 1,699 |
Decrease DMG
| Grade | +0 | +5 | +10 | +15 |
|---|---|---|---|---|
| Grade 1 | 9 | 20 | 31 | 42 |
| Grade 2 | 20 | 42 | 64 | 87 |
| Grade 3 | 31 | 67 | 103 | 140 |
| Grade 4 | 41 | 91 | 142 | 193 |
| Grade 5 | 51 | 117 | 183 | 250 |
| Grade 6 | 62 | 148 | 233 | 319 |
| Grade 7 | 74 | 180 | 286 | 392 |
| Grade 8 | 84 | 210 | 335 | 461 |
| Grade 9 | 94 | 240 | 386 | 532 |
| Grade 10 | 106 | 276 | 446 | 616 |
Type 2. Core Stats — 15% of artifacts
Increase Command, Increase Dexterity, Increase Energy, Increase Stamina, Increase Strength
| Grade | +0 | +5 | +10 | +15 |
|---|---|---|---|---|
| Grade 1 | 23 | 48 | 72 | 97 |
| Grade 2 | 47 | 98 | 150 | 202 |
| Grade 3 | 71 | 154 | 237 | 320 |
| Grade 4 | 97 | 217 | 337 | 456 |
| Grade 5 | 123 | 283 | 442 | 602 |
| Grade 6 | 148 | 348 | 548 | 747 |
| Grade 7 | 174 | 415 | 657 | 899 |
| Grade 8 | 201 | 489 | 776 | 1,064 |
| Grade 9 | 228 | 564 | 899 | 1,235 |
| Grade 10 | 254 | 637 | 1,020 | 1,403 |
Type 3. Offense Utility — 20% of artifacts
Increase Crit DMG, Increase Excellent DMG
| Grade | +0 | +5 | +10 | +15 |
|---|---|---|---|---|
| Grade 1 | 16 | 34 | 52 | 71 |
| Grade 2 | 32 | 70 | 108 | 146 |
| Grade 3 | 49 | 114 | 178 | 243 |
| Grade 4 | 67 | 162 | 256 | 351 |
| Grade 5 | 84 | 210 | 335 | 461 |
| Grade 6 | 102 | 264 | 426 | 587 |
| Grade 7 | 121 | 321 | 521 | 722 |
| Grade 8 | 139 | 381 | 622 | 864 |
| Grade 9 | 156 | 438 | 719 | 1,001 |
| Grade 10 | 175 | 502 | 828 | 1,155 |
Increase ATK Speed
| Grade | +0 | +5 | +10 | +15 |
|---|---|---|---|---|
| Grade 1 | 1 | 1 | 2 | 2 |
| Grade 2 | 2 | 3 | 3 | 4 |
| Grade 3 | 3 | 4 | 5 | 6 |
| Grade 4 | 4 | 5 | 7 | 8 |
| Grade 5 | 5 | 7 | 8 | 10 |
| Grade 6 | 6 | 8 | 10 | 12 |
| Grade 7 | 7 | 9 | 12 | 14 |
| Grade 8 | 8 | 11 | 13 | 16 |
| Grade 9 | 9 | 12 | 15 | 18 |
| Grade 10 | 10 | 13 | 17 | 20 |
Increase Skillpower
| Grade | +0 | +5 | +10 | +15 |
|---|---|---|---|---|
| Grade 1 | 20 | 40 | 61 | 82 |
| Grade 2 | 39 | 82 | 124 | 167 |
| Grade 3 | 61 | 130 | 200 | 269 |
| Grade 4 | 81 | 179 | 276 | 374 |
| Grade 5 | 104 | 233 | 363 | 492 |
| Grade 6 | 126 | 290 | 453 | 617 |
| Grade 7 | 147 | 344 | 542 | 739 |
| Grade 8 | 170 | 405 | 639 | 874 |
| Grade 9 | 191 | 463 | 734 | 1,005 |
| Grade 10 | 214 | 526 | 837 | 1,149 |
Type 4. All-Round Mix — 25% of artifacts
Increase Attack/Wizardry, Increase Curse
| Grade | +0 | +5 | +10 | +15 |
|---|---|---|---|---|
| Grade 1 | 16 | 33 | 51 | 68 |
| Grade 2 | 32 | 66 | 100 | 134 |
| Grade 3 | 49 | 104 | 159 | 214 |
| Grade 4 | 66 | 142 | 218 | 295 |
| Grade 5 | 84 | 185 | 286 | 387 |
| Grade 6 | 102 | 230 | 357 | 485 |
| Grade 7 | 119 | 273 | 426 | 579 |
| Grade 8 | 138 | 320 | 503 | 685 |
| Grade 9 | 155 | 366 | 576 | 786 |
| Grade 10 | 174 | 415 | 657 | 899 |
Increase Defense
| Grade | +0 | +5 | +10 | +15 |
|---|---|---|---|---|
| Grade 1 | 12 | 27 | 41 | 56 |
| Grade 2 | 27 | 58 | 90 | 121 |
| Grade 3 | 41 | 91 | 142 | 193 |
| Grade 4 | 54 | 127 | 200 | 272 |
| Grade 5 | 68 | 165 | 262 | 359 |
| Grade 6 | 84 | 210 | 335 | 461 |
| Grade 7 | 98 | 252 | 406 | 560 |
| Grade 8 | 113 | 296 | 480 | 663 |
| Grade 9 | 129 | 346 | 564 | 782 |
| Grade 10 | 143 | 394 | 644 | 895 |
Decrease DMG
| Grade | +0 | +5 | +10 | +15 |
|---|---|---|---|---|
| Grade 1 | 8 | 18 | 28 | 38 |
| Grade 2 | 15 | 32 | 49 | 65 |
| Grade 3 | 23 | 50 | 77 | 103 |
| Grade 4 | 32 | 70 | 108 | 146 |
| Grade 5 | 41 | 91 | 142 | 193 |
| Grade 6 | 48 | 110 | 173 | 235 |
| Grade 7 | 57 | 134 | 211 | 288 |
| Grade 8 | 66 | 158 | 251 | 343 |
| Grade 9 | 74 | 180 | 286 | 392 |
| Grade 10 | 83 | 206 | 329 | 452 |
Increase Elemental ATK, Increase Skillpower
| Grade | +0 | +5 | +10 | +15 |
|---|---|---|---|---|
| Grade 1 | 14 | 29 | 44 | 59 |
| Grade 2 | 27 | 55 | 84 | 112 |
| Grade 3 | 42 | 87 | 133 | 178 |
| Grade 4 | 57 | 121 | 186 | 250 |
| Grade 5 | 71 | 154 | 237 | 320 |
| Grade 6 | 87 | 191 | 296 | 401 |
| Grade 7 | 102 | 230 | 357 | 485 |
| Grade 8 | 118 | 269 | 421 | 572 |
| Grade 9 | 133 | 307 | 481 | 655 |
| Grade 10 | 148 | 348 | 548 | 747 |
Type 5. Elemental — 15% of artifacts
Increase Elemental ATK, Increase Elemental DEF
| Grade | +0 | +5 | +10 | +15 |
|---|---|---|---|---|
| Grade 1 | 23 | 48 | 72 | 97 |
| Grade 2 | 47 | 98 | 150 | 202 |
| Grade 3 | 71 | 154 | 237 | 320 |
| Grade 4 | 97 | 217 | 337 | 456 |
| Grade 5 | 123 | 283 | 442 | 602 |
| Grade 6 | 148 | 348 | 548 | 747 |
| Grade 7 | 174 | 415 | 657 | 899 |
| Grade 8 | 201 | 489 | 776 | 1,064 |
| Grade 9 | 228 | 564 | 899 | 1,235 |
| Grade 10 | 254 | 637 | 1,020 | 1,403 |
Increase Elemental ATK Success Rate, Increase Elemental DEF Success Rate
| Grade | +0 | +5 | +10 | +15 |
|---|---|---|---|---|
| Grade 1 | 18 | 39 | 60 | 81 |
| Grade 2 | 38 | 85 | 132 | 179 |
| Grade 3 | 57 | 134 | 211 | 288 |
| Grade 4 | 78 | 191 | 304 | 418 |
| Grade 5 | 98 | 252 | 406 | 560 |
| Grade 6 | 119 | 317 | 514 | 712 |
| Grade 7 | 140 | 385 | 629 | 874 |
| Grade 8 | 160 | 451 | 742 | 1,033 |
| Grade 9 | 182 | 525 | 868 | 1,211 |
| Grade 10 | 204 | 601 | 999 | 1,396 |
Type 6. Attack, Wizardry and Curse — 10% of artifacts
Increase Attack/Wizardry, Increase Curse, Increase Max Attack/Wizardry, Increase Max Curse, Increase Min Attack/Wizardry, Increase Min Curse
| Grade | +0 | +5 | +10 | +15 |
|---|---|---|---|---|
| Grade 1 | 27 | 55 | 84 | 112 |
| Grade 2 | 56 | 119 | 181 | 244 |
| Grade 3 | 84 | 185 | 286 | 387 |
| Grade 4 | 114 | 259 | 405 | 550 |
| Grade 5 | 144 | 338 | 531 | 724 |
| Grade 6 | 175 | 419 | 663 | 907 |
| Grade 7 | 206 | 503 | 801 | 1,098 |
| Grade 8 | 236 | 587 | 937 | 1,288 |
| Grade 9 | 268 | 676 | 1,084 | 1,492 |
| Grade 10 | 299 | 767 | 1,235 | 1,703 |
Type 7. Attack and Curse (Top Tier) — 5% of artifacts
Increase Attack/Wizardry, Increase Curse, Increase Max Attack/Wizardry, Increase Max Curse
| Grade | +0 | +5 | +10 | +15 |
|---|---|---|---|---|
| Grade 1 | 24 | 53 | 81 | 109 |
| Grade 2 | 49 | 114 | 178 | 243 |
| Grade 3 | 76 | 187 | 298 | 409 |
| Grade 4 | 104 | 268 | 432 | 597 |
| Grade 5 | 131 | 355 | 578 | 802 |
| Grade 6 | 158 | 442 | 727 | 1,012 |
| Grade 7 | 186 | 539 | 892 | 1,245 |
| Grade 8 | 214 | 640 | 1,066 | 1,491 |
| Grade 9 | 242 | 740 | 1,238 | 1,737 |
| Grade 10 | 270 | 848 | 1,426 | 2,004 |
MU Online Season 21 Beginner's Guide
New to Eden MU, or coming back to MU Online after a few seasons away? This guide walks you through your first days on our Season 21 Part 2-3 server: creating an account, picking a class, and everything worth doing before your first reset.
Getting started
- Register an account on the homepage and download the client.
- Log in through the launcher. It patches itself, so you always run the current version.
- Create a character. All 16 Season 21 classes are open from the start, no class is locked behind level or payment.
Which class should I pick?
Whatever you enjoy. Every class evolves five times through quests (see the Classes article) and reaches the same 100-reset stat ceiling, so there is no trap choice. Classic starting points: Dark Knight for straightforward melee, Dark Wizard for area damage, Fairy Elf if you want to buff and shoot from range.
Your first day, in order
| Step | Why |
|---|---|
| Hunt in Lorencia or Elbeland to about level 50 | Monsters here drop class-appropriate Excellent Ancient gear (see Starter Drops), so you gear up as you level |
| Open the Runic Forge (F3) at level 50 | Permanent stat engraving that is never wiped, start early |
| Join a Gens faction at level 50 | Unlocks faction PvP and contribution ranking |
| Keep killing: Ancient Insignia (F4) levels itself | A 25-node passive tree fed by every monster and boss you kill |
| Stack jewels in the Jewel Warehouse (F10) | Account-wide storage, every character on your account can use them |
| Run Blood Castle and Devil Square daily | Best experience and jewel income per hour while leveling |
Frequently asked questions
What are the server rates?
Experience x500, Master experience x500, item drop 80%. VIP raises these further.
How does the reset system work?
Reach level 400, have 100,000,000 Zen, type /reset. You return to level 1 with 120 bonus stat points. 100 resets is the cap and fully maxes your stats. Details in the Reset System article.
Is Eden MU pay to win?
No. The strongest items in the game (Mastery, Legendary, Spider Artifacts) drop or are crafted in game. Paid options are convenience and cosmetics.
When are events?
Something runs every hour: 14 scheduled invasions daily, Blood Castle, Devil Square, Chaos Castle, plus weekend guild events. The homepage sidebar shows the live schedule, and the Invasions article has the full timetable.
MU Online Leveling Guide (Level 1 to 400)
The fastest route from a fresh character to level 400 on Eden MU (Season 21, exp x500). The short version: follow the map ladder below, run Blood Castle and Devil Square whenever they open, and pick up the Excellent Ancient gear that leveling monsters drop along the way.
Map ladder
| Level | Map | Notes |
|---|---|---|
| 1 to 50 | Lorencia or Elbeland | Safe starting zones, first Ancient set pieces |
| 30 to 80 | Noria | Good for ranged classes, early jewel drops |
| 60 to 150 | Devias | Ice monsters, denser packs |
| 100 to 250 | Dungeon | Underground chain with rising difficulty |
| 150 to 350 | Lost Tower | Great experience for the effort |
| 250 to 400 | Atlans / Tarkan | Pre-reset zones, real drop tables begin |
| 350 to 400 | Karutan 1-2, Swamp of Calmness, Raklion | Finishing stretch before /reset |
Do these while leveling
- Blood Castle and Devil Square beat open-field hunting for experience per hour. Enter every window you can.
- Elite monsters are worth the detour, they hit harder but pay much better.
- Party up. Party play speeds up harder zones considerably.
- Watch invasions. The in-game Invasion Viewer (F11) counts down to the next spawn, and invasion bosses drop well for their level.
- Bank your jewels in the Jewel Warehouse (F10) instead of vaulting them per character.
After 400
Your first /reset costs 100,000,000 Zen and grants 120 bonus stat points, and leveling starts again with a stronger base. From here the loop is level, reset, repeat toward 100 resets, with the Master Level track and endgame maps (Ferea, Kanturu, Aida) opening after your 3rd class quest. See the Endgame Guide for what comes next.
MU Online Endgame Guide: Level 400 and Beyond
Level 400 is where Eden MU actually starts. This is the roadmap for everything that opens up: Master Levels, the reset ladder, the gear climb to Legendary, and the events that fill the weekly calendar on our Season 21 server.
The three progression tracks
| Track | What it is | Read more |
|---|---|---|
| Resets | /reset at 400 for 120 bonus stat points, up to 100 resets for maxed stats | Reset System |
| Master Level | Complete the 3rd class quest at Apostle Devin in Crywolf, then level a separate Master track with its own skill tree | Master Level |
| Gear | 10 Mastery tiers, then Legendary: Temple Guard and Imperial. Rings, pendants and Spider Artifacts fill the slots around them | Mastery, Legendary, Artifacts |
Where to hunt after 400
| Level | Map |
|---|---|
| 400+ | Ferea (Easy), Kanturu Ruins |
| 500+ | Aida |
| 600+ | Ferea (Hard) |
| 800+ | Kanturu Tower |
| 1000+ | Vulcanus (Gens PvP zone) |
| 1450+ | Distorted Karutan |
From Atlans Abyss 3 upward, regular monsters also drop Spider Artifacts, Jewels of Bless, Soul and Creation, and artifact upgrade materials.
The weekly calendar
- Every day: 14 scheduled invasions, Blood Castle, Devil Square, Chaos Castle, and ten World Bosses on 5 to 28 hour cooldowns.
- The Hollow Sovereign: a living world boss in Devias that speaks, remembers its killers, and pays up to 100,000 Ruud.
- Saturday: Throne of Eden 18:00, Castle Siege 20:00 to 22:00 (server time).
- Sunday: Throne of Eden 20:00.
- Ranked PvP anytime: The Crucible (F7) runs 14-day ELO seasons from 35 resets, and the Bounty Board (F6) pays for open-world kills.
Long-term goals
- Fill all 39 Runic Forge slots and align full lines for Resonance bonuses.
- Max the 25-node Ancient Insignia tree.
- Climb Mastery to tier 10, craft Temple Guard, then Imperial.
- Collect a grade 10 Spider Artifact of each type and push it to +15.
- Take the castle with your guild and hold it.
Invasions
How invasions work
Invasions are timed monster spawns that drop into the open world on a fixed daily timetable. A server-wide message announces each one as it begins; the monsters stay for the invasion’s duration or until they are all killed. Most invasions spawn a named boss whose kill rolls a special reward; a few are swarm events with no boss, where every spawned monster carries the reward.
Times are server time. The homepage sidebar and the in-game Invasion Viewer show the next upcoming invasions live, counting down to each one.
Daily timetable
| Invasion | Times | Lasts | Where |
|---|---|---|---|
| Golden | 00:25 · 12:25 | 10 min | Lorencia, Dungeon, Devias, Noria, Lost Tower, Atlans, Tarkan, Icarus, Aida, Kanturu 1, Kanturu 2, Elbeland, Swamp of Calmness, Raklion 1 |
| White Wizard | 00:50 · 04:50 · 08:50 · 12:50 · 16:50 · 20:50 | 10 min | Lorencia, Devias, Noria |
| Medusa | 01:00 · 05:00 · 09:00 · 13:00 · 17:00 · 21:00 | 10 min | Swamp of Calmness |
| Red Dragon | 01:15 · 09:15 · 17:15 | 60 min | Lorencia, Devias, Noria |
| Muun Egg | 01:50 · 09:50 · 13:50 · 21:50 | 10 min | Lorencia, Devias, Noria, Lost Tower, Icarus, Kalima 5, Aida, Kalima 7, Kanturu 1, Elbeland, Swamp of Calmness, Raklion 1 |
| Tiger | 02:10 · 14:10 | 60 min | Old Kethotum |
| Salamander | 03:45 · 15:45 | 60 min | Acheron 1, Deventer 1, Urk Mountain 1, Nars |
| Skeleton King | 04:05 · 16:05 | 60 min | Lorencia, Noria, Elbeland |
| Metal Balrog | 04:30 · 16:30 | 60 min | Lorencia, Devias, Noria |
| Undine | 05:45 · 17:45 | 60 min | Acheron 1, Deventer 1, Urk Mountain 1, Nars |
| Ice Queen | 06:45 · 18:45 | 60 min | Devias |
| Hydra | 07:10 · 19:10 | 60 min | Atlans |
| Gold Rabbit | 10:15 · 22:15 | 10 min | Aida |
| Snake | 11:10 · 23:10 | 60 min | Vulcanus |
Ruud rewards
Every invasion monster pays Ruud on death, on top of its item reward. The amount rises from the starter towns to the top maps. The numbers below are read from the server's reward tables.
| Invasion | Maps | Monster | Spawns per run | Ruud per kill |
|---|---|---|---|---|
| Ice Queen | Devias | Ice Queen (level 52) | 20 | 900 to 1,500 |
| Metal Balrog | Lorencia, Devias, Noria | Metal Balrog (level 77) | 60 | 1,500 to 2,400 |
| Skeleton King | Lorencia, Noria, Elbeland | Death King (level 88) | 60 | 1,800 to 2,700 |
| Red Dragon | Lorencia, Devias, Noria | Red Dragon (level 147) | 60 | 2,700 to 3,900 |
| White Wizard | Lorencia, Devias, Noria | White wizard (level 87) | 3 | 12,000 to 18,000 |
| Gold Rabbit | Aida | Gold Rabbit (level 149) | 20 | 2,400 to 3,600 |
| Hydra | Atlans | Hydra (level 74) | 20 | 3,000 to 4,500 |
| Snake | Vulcanus | Green Snake (green) (level 100) | 20 | 4,500 to 6,600 |
| Undine | Nars, Urk Mountain 1, Deventer 1, Acheron 1 | Undine (level 113) | 65 | 6,000 to 8,400 |
| Salamander | Nars, Urk Mountain 1, Deventer 1, Acheron 1 | Salamander (level 113) | 65 | 7,500 to 10,500 |
| Tiger | Old Kethotum | Tiger (Green) (level 100) | 20 | 12,000 to 18,000 |
| Medusa | Swamp of Calmness | Medusa (level 175) | 4 | 60,000 to 90,000 |
Golden invasion
Each golden monster pays by its level and still drops its Box of Kundun.
| Monster | Map | Spawns | Ruud per kill |
|---|---|---|---|
| Golden Budge Dragon (level 15) | Lorencia | 5 | 750 to 1,200 |
| Golden Goblin (level 20) | Noria | 5 | 1,050 to 1,500 |
| Golden Rabbit (level 40) | Elbeland | 5 | 2,100 to 3,150 |
| Golden Soldier (level 46) | Devias | 5 | 2,550 to 3,600 |
| Golden Titan (level 53) | Devias | 5 | 2,850 to 4,200 |
| Golden Dark Knight (level 60) | Dungeon | 3 | 3,300 to 4,650 |
| Golden Vepar (level 61) | Atlans | 5 | 3,300 to 4,800 |
| Golden Devil (level 72) | Lost Tower | 3 | 3,900 to 5,550 |
| Golden Wheel (level 77) | Tarkan | 5 | 4,200 to 6,000 |
| Golden Lizard King (level 83) | Atlans | 3 | 4,500 to 6,450 |
| Golden Stone Golem (level 84) | Aida | 3 | 4,500 to 6,600 |
| Golden Tantalos (level 90) | Tarkan | 3 | 4,800 to 7,050 |
| Golden Crust (level 92) | Icarus | 3 | 4,950 to 7,200 |
| Golden Satyros (level 108) | Kanturu 1 | 3 | 5,850 to 8,400 |
| Golden Napin (level 112) | Swamp of Calmness | 3 | 6,000 to 8,700 |
| Golden Twin Tail (level 130) | Kanturu 2 | 3 | 7,050 to 10,200 |
| Golden Iron Knight (level 145) | Raklion 1 | 3 | 7,800 to 11,250 |
Muun Egg invasion
| Monster | Maps | Spawns per run | Ruud per kill |
|---|---|---|---|
| Moon Rabbit | Lorencia, Devias, Noria, Elbeland | 160 | 180 to 300 |
| Pouch of Blessing | Lost Tower, Icarus, Kalima 5, Aida | 160 | 300 to 480 |
| Fire Flame Ghost | Kalima 7, Kanturu 1, Swamp of Calmness, Raklion 1 | 160 | 450 to 750 |
The White Wizard's ogres and Medusa's Sapi Queens carry no reward: only the White Wizard and Medusa themselves pay.
Each invasion
Skeleton King
| Times | 04:05 · 16:05 (60 min) |
| Maps | Lorencia, Noria, Elbeland |
| Boss | Death King |
| Total spawns | 60 |
| Boss rewards | Talisman of Luck, Talisman of Chaos Assembly, Elemental Talisman of Luck, Elemental Talisman of Chaos, Death King's Bone, Hell Maine's Leather, Dark Phoenix Flame, Death Beam Knight Soul … and 1 more |
| Ruud per kill | 1,800 to 2,700 |
Red Dragon
| Times | 01:15 · 09:15 · 17:15 (60 min) |
| Maps | Lorencia, Devias, Noria |
| Boss | Red Dragon |
| Total spawns | 60 |
| Boss rewards | Jewel of Bless, Jewel of Soul, Jewel of Chaos, Jewel of Life, Jewel of Creation |
| Ruud per kill | 2,700 to 3,900 |
Golden
| Times | 00:25 · 12:25 (10 min) |
| Maps | Lorencia, Dungeon, Devias, Noria, Lost Tower, Atlans, Tarkan, Icarus, Aida, Kanturu 1, Kanturu 2, Elbeland, Swamp of Calmness, Raklion 1 |
| Boss | Great Golden Dragon |
| Total spawns | 65 |
| Boss rewards | Box of Luck |
| Ruud per kill | 750 to 11,250 depending on the monster |
White Wizard
| Times | 00:50 · 04:50 · 08:50 · 12:50 · 16:50 · 20:50 (10 min) |
| Maps | Lorencia, Devias, Noria |
| Boss | White wizard |
| Total spawns | 63 |
| Boss rewards | Jewel of Bless, Wizards Ring |
| Ruud per kill | 12,000 to 18,000 |
Gold Rabbit
| Times | 10:15 · 22:15 (10 min) |
| Maps | Aida |
| Spawns | Gold Rabbit — no boss, every monster carries the reward |
| Total spawns | 20 |
| Monster rewards | Box of Luck |
| Ruud per kill | 2,400 to 3,600 |
Medusa
| Times | 01:00 · 05:00 · 09:00 · 13:00 · 17:00 · 21:00 (10 min) |
| Maps | Swamp of Calmness |
| Boss | Medusa |
| Total spawns | 32 |
| Boss rewards | Eternal Wing Helm, Titan Helm, Brave Helm, Seraphim Helm, Divine Helm, Royal Mask, Hades Helm, Rune Divine Helmet … and 228 more |
| Ruud per kill | 60,000 to 90,000 |
Muun Egg
| Times | 01:50 · 09:50 · 13:50 · 21:50 (10 min) |
| Maps | Lorencia, Devias, Noria, Lost Tower, Icarus, Kalima 5, Aida, Kalima 7, Kanturu 1, Elbeland, Swamp of Calmness, Raklion 1 |
| Spawns | Moon Rabbit, Pouch of Blessing, Fire Flame Ghost — no boss, every monster carries the reward |
| Total spawns | 480 |
| Monster rewards | WereRabbit Egg, Lucky Bag Egg, Fire Flame Ghost Egg |
| Ruud per kill | 180 to 750 depending on the monster |
Metal Balrog
| Times | 04:30 · 16:30 (60 min) |
| Maps | Lorencia, Devias, Noria |
| Boss | Metal Balrog |
| Total spawns | 60 |
| Boss rewards | Lv.1 Wing Relic, Loch's Feather, Jewel of Bless, Jewel of Soul, Jewel of Chaos, Jewel of Life, Jewel of Creation |
| Ruud per kill | 1,500 to 2,400 |
Ice Queen
| Times | 06:45 · 18:45 (60 min) |
| Maps | Devias |
| Boss | Ice Queen |
| Total spawns | 20 |
| Boss rewards | Ruud Box (500), Earring of Wrath (Left), Earring of Wrath (Right), Lower Magic Stone, Medium Magic Stone |
| Ruud per kill | 900 to 1,500 |
Hydra
| Times | 07:10 · 19:10 (60 min) |
| Maps | Atlans |
| Boss | Hydra |
| Total spawns | 20 |
| Boss rewards | Jewel of Bless, Jewel of Soul, Jewel of Chaos, Jewel of Life, Jewel of Creation |
| Ruud per kill | 3,000 to 4,500 |
Undine
| Times | 05:45 · 17:45 (60 min) |
| Maps | Acheron 1, Deventer 1, Urk Mountain 1, Nars |
| Boss | Undine |
| Total spawns | 65 |
| Boss rewards | Bronze Armor, Bronze Pants, Bronze Boots, Dragon Helm, Dragon Gloves, Dragon Boots, Lighting Sword, Pad Helm … and 98 more |
| Ruud per kill | 6,000 to 8,400 |
Salamander
| Times | 03:45 · 15:45 (60 min) |
| Maps | Acheron 1, Deventer 1, Urk Mountain 1, Nars |
| Boss | Salamander |
| Total spawns | 65 |
| Boss rewards | Muren's Book of Magic, Scroll of Etramu, Lorencia Knights' Iron Shield, Iron Shield of the Magic, Hero Elixir, Brave Hero Elixir, Gladiator's Dagger, Merciless Gladiator's Dagger … and 3 more |
| Ruud per kill | 7,500 to 10,500 |
Snake
| Times | 11:10 · 23:10 (60 min) |
| Maps | Vulcanus |
| Boss | Green Snake (green) |
| Total spawns | 20 |
| Boss rewards | Lapidary Stone |
| Ruud per kill | 4,500 to 6,600 |
Tiger
| Times | 02:10 · 14:10 (60 min) |
| Maps | Old Kethotum |
| Boss | Tiger (Green) |
| Total spawns | 20 |
| Boss rewards | Coin of Miracle, Jewel of Bless, Jewel of Soul |
| Ruud per kill | 12,000 to 18,000 |
Harmony Options
Overview
Jewel of Harmony adds a random bonus option to weapons and armor. The bonus can be upgraded further using additional Jewels of Harmony for stronger effects.
How to Apply
- Obtain a Jewel of Harmony from monster drops or crafting
- Right-click the jewel, then click on your target item
- A random Harmony option is applied
- Use more Jewels of Harmony on the same item to upgrade the option level
Important Notes
- The option type is chosen randomly on first application
- Failed upgrades consume the jewel with no effect
- Item must be +0 to +15 to receive Harmony options
- Only one Harmony option per item
- Use Higher Refining Stone to remove and reroll the option
Socket System & Seed Spheres
How it works
Socket items carry up to 3 empty slots under their name. You fill a slot with a Seed Sphere: an elemental seed (Fire, Ice, Lightning for weapons; Water, Wind, Earth for armor) fused with a blank Sphere. Each Seed Sphere rolls one option from its element's pool, and the option's value grows with the sphere's level, 1 to 10.
Where socket items drop
Raklion is the home of socket gear. Every monster there drops the socket items at or below its own level, and each one comes with sockets already open: 1 socket (60%), 2 sockets (30%) or 3 sockets (10%).
| Monster | Level | Socket items it can drop |
|---|---|---|
| Ice Walker | 102 | Early boots, gloves and shields (Divine, Brave, Destroy, Hades, Titan and similar) |
| Giant Mammoth | 112 | Adds helms and the first pants |
| Ice Giant | 122 | Adds most pants, the first armors, Frost Mace |
| Coolutin | 132 | Adds the remaining first-tier armors and more shields |
| Iron Knight, Dark Mammoth | 142, 140 | Adds the first socket weapons (Flameberge, Sword Breaker, Dark Stinger, Deadly Staff) and second-tier boots, gloves and helms |
| Dark Giant | 143 | Adds more second-tier helms and gloves (Succubus, Dark Devil, Stormwing and similar) |
| Dark Coolutin, Dark Iron Knight | 145, 148 | Everything, including the top weapons: Sonic Blade, Asura, Cyclone Sword, Blast Break, Devast Claw, Thunderbolt, Angelic Bow, Devil Crossbow, Miracle Staff and the rest of that tier |
A dropped item with fewer than 3 sockets can be extended with a Jewel of Socket, which adds one slot.
Getting Seed Spheres on Eden
- Seed Capsules (one per element) come from the Blood Castle 8 reward. Opening one gives a ready-made Seed Sphere of that element: Level 3 (60%), Level 4 (30%) or Level 5 (10%).
- Sphere Upgrade Rune Capsules are sold by Priest James in the Ruud shop for 1,000 Ruud. Each one contains 3 Sphere Upgrade Runes.
- Blank Sphere, Sphere [Di] and Sphere [Tri] drop from any monster on any map (10% each) for crafting your own spheres at the Seed Master.
Seed Master operations
| Operation | Cost | Success |
|---|---|---|
| Extract a Seed from an excellent or set item | 10,000,000 Zen | 80% |
| Combine Seed + blank Sphere into a Seed Sphere | 10,000,000 Zen | 100% |
| Mount a Seed Sphere into a socket | 10,000,000 Zen | 100% |
| Remove a Seed Sphere from a socket | 10,000,000 Zen | 90% |
Upgrading spheres
Sphere Upgrade Runes raise a Seed Sphere one level at a time at the Seed Master, always 100% success. Each step costs more Zen and more runes:
| Upgrade | Zen | Runes |
|---|---|---|
| Level 1 to 2 | 10,000,000 | 4 |
| Level 2 to 3 | 13,000,000 | 5 |
| Level 3 to 4 | 16,000,000 | 5 |
| Level 4 to 5 | 19,000,000 | 5 |
| Level 5 to 6 | 22,000,000 | 6 |
| Level 6 to 7 | 25,000,000 | 7 |
| Level 7 to 8 | 28,000,000 | 8 |
| Level 8 to 9 | 31,000,000 | 9 |
| Level 9 to 10 | 34,000,000 | 10 |
Option tables
Values by sphere level. "Roll" is the chance a new sphere of that element gets the option. Percent options are marked; everything else is a flat bonus.
Fire (weapons)
| Option | Roll | Lv1 | Lv2 | Lv3 | Lv4 | Lv5 | Lv6 | Lv7 | Lv8 | Lv9 | Lv10 |
|---|---|---|---|---|---|---|---|---|---|---|---|
| Increase DMG and Wizardry DMG per 20 levels | 18% | 11 | 12 | 13 | 14 | 15 | 16 | 17 | 18 | 19 | 20 |
| Attack speed increase | 12% | 1 | 2 | 6 | 10 | 15 | 21 | 27 | 34 | 42 | 50 |
| Maximum attack/Wizardry increase | 18% | 10 | 47 | 114 | 200 | 303 | 420 | 549 | 689 | 840 | 1000 |
| Minimum attack/Wizardry increase | 24% | 8 | 37 | 91 | 160 | 243 | 336 | 439 | 551 | 672 | 800 |
| Attack/Wizardry increase | 12% | 9 | 42 | 102 | 180 | 273 | 378 | 494 | 620 | 756 | 900 |
| AG cost decrease | 18% | 40% | 41% | 42% | 43% | 44% | 45% | 46% | 47% | 48% | 49% |
Ice (weapons)
| Option | Roll | Lv1 | Lv2 | Lv3 | Lv4 | Lv5 | Lv6 | Lv7 | Lv8 | Lv9 | Lv10 |
|---|---|---|---|---|---|---|---|---|---|---|---|
| HP gained on monster kill | 21% | 200 | 933 | 2273 | 4007 | 6067 | 8393 | 10973 | 13780 | 16793 | 20000 |
| MP gained on monster kill | 14% | 200 | 933 | 2273 | 4007 | 6067 | 8393 | 10973 | 13780 | 16793 | 20000 |
| Skill attack increase | 7% | 9 | 42 | 102 | 180 | 273 | 378 | 494 | 620 | 756 | 900 |
| Attack rating increase | 36% | 20 | 93 | 227 | 401 | 607 | 839 | 1097 | 1378 | 1679 | 2000 |
| Item durability increase | 21% | 30% | 32% | 34% | 36% | 40% | 44% | 49% | 54% | 60% | 66% |
Lightning (weapons)
| Option | Roll | Lv1 | Lv2 | Lv3 | Lv4 | Lv5 | Lv6 | Lv7 | Lv8 | Lv9 | Lv10 |
|---|---|---|---|---|---|---|---|---|---|---|---|
| Excellent damage increase | 29% | 9 | 42 | 102 | 180 | 273 | 378 | 494 | 620 | 756 | 900 |
| Excellent damage rate increase | 14% | 10% | 11% | 12% | 13% | 14% | 15% | 16% | 17% | 18% | 19% |
| Critical damage increase | 43% | 9 | 42 | 102 | 180 | 273 | 378 | 494 | 620 | 756 | 900 |
| Critical damage rate increase | 14% | 8% | 9% | 10% | 11% | 12% | 13% | 14% | 15% | 16% | 17% |
Water (armor)
| Option | Roll | Lv1 | Lv2 | Lv3 | Lv4 | Lv5 | Lv6 | Lv7 | Lv8 | Lv9 | Lv10 |
|---|---|---|---|---|---|---|---|---|---|---|---|
| Block rating increase | 7% | 10% | 10% | 11% | 13% | 15% | 17% | 20% | 23% | 25% | 29% |
| Defense increase | 20% | 30 | 140 | 341 | 601 | 910 | 1259 | 1646 | 2067 | 2519 | 3000 |
| Shield protection increase | 33% | 100% | 137% | 204% | 292% | 396% | 514% | 644% | 785% | 938% | 1100% |
| Damage reduction | 13% | 2% | 2% | 2% | 2% | 2% | 2% | 4% | 4% | 4% | 6% |
| Damage reflection | 27% | 4% | 4% | 5% | 7% | 8% | 10% | 12% | 15% | 17% | 20% |
Wind (armor)
| Option | Roll | Lv1 | Lv2 | Lv3 | Lv4 | Lv5 | Lv6 | Lv7 | Lv8 | Lv9 | Lv10 |
|---|---|---|---|---|---|---|---|---|---|---|---|
| Automatic Life recovery increase | 16% | 8 | 81 | 216 | 391 | 598 | 832 | 1092 | 1374 | 1677 | 2000 |
| Maximum Life increase | 12% | 100 | 392 | 927 | 1620 | 2440 | 3371 | 4400 | 5518 | 6720 | 8000 |
| Maximum Mana increase | 16% | 150 | 440 | 972 | 1660 | 2475 | 3400 | 4422 | 5534 | 6728 | 8000 |
| Automatic Mana recovery increase | 20% | 7 | 15 | 31 | 52 | 76 | 104 | 135 | 168 | 204 | 243 |
| Maximum AG increase | 16% | 70 | 86 | 117 | 157 | 205 | 258 | 318 | 382 | 452 | 526 |
| AG value increase | 20% | 5 | 6 | 8 | 12 | 16 | 20 | 25 | 31 | 36 | 43 |
Earth (armor)
| Option | Roll | Lv1 | Lv2 | Lv3 | Lv4 | Lv5 | Lv6 | Lv7 | Lv8 | Lv9 | Lv10 |
|---|---|---|---|---|---|---|---|---|---|---|---|
| Strength increase | 25% | 6 | 42 | 110 | 197 | 300 | 417 | 547 | 687 | 839 | 1000 |
| Agility increase | 25% | 1 | 38 | 105 | 193 | 297 | 414 | 544 | 686 | 838 | 1000 |
| Health increase | 25% | 30 | 73 | 152 | 255 | 376 | 514 | 666 | 832 | 1010 | 1200 |
| Energy increase | 25% | 10 | 46 | 113 | 200 | 303 | 419 | 548 | 689 | 839 | 1000 |
Tips
- Weapon elements are offense: Fire for raw attack and speed, Ice for skill attack, attack rating and sustain on kill, Lightning for excellent and critical damage.
- Armor elements are defense and pools: Water for defense, shield and reflect, Wind for HP, MP, AG and recovery, Earth for base stats.
- The option is rolled when the sphere is made, the level is what you upgrade. Re-roll by making a new sphere; upgrade by feeding runes.
- Fire's "per 20 levels" option scales with your character level, so it keeps growing long after the sphere is maxed.
Pentagram & Errtels
Overview
The Pentagram system adds elemental damage and defense to your character. Equip a Pentagram and fill its slots with Errtels to gain powerful elemental bonuses.
Pentagrams
- Dropped from monsters with 2-4 slots
- 5th slot unlocked via Expansion Scroll
- Each Pentagram has an elemental affinity
- Normal Pentagrams use Normal Errtels
- Mastery Pentagrams use Mastery Errtels (stronger)
Where to get Pentagrams
Named Pentagrams do not drop from ordinary monsters. They come from boss and event reward tables and from a few items you open. This list is generated from the server's reward tables. When a source rolls a Pentagram, each one in its pool is equally likely.
Bosses
| Source | Type | Pentagram pool |
|---|---|---|
| Kundun | Kalima 7 | 1 of 14: Ancient Icarus Scroll, Antonia's Sword, Arca's Prophecy, Empire Guardians' Stronghold, Gladiator's Dagger, Iron Shield of the Magic, Kundun's Madness Blade, Kundun's Magic Spell Scroll, Kundun's Seal Scroll, Lemuria's Orb, Lorencia Knights' Iron Shield, Merciless Gladiator's Dagger, Runedil's Goldentune Harp, Thoughtful Sage's Jewel |
| Balgass | event boss | 1 of 15: Ancient Icarus Scroll, Antonia's Sword, Arca's Prophecy, Empire Guardians' Stronghold, Gladiator's Dagger, Iron Shield of the Magic, Kundun's Madness Blade, Kundun's Magic Spell Scroll, Kundun's Seal Scroll, Lemuria's Orb, Lorencia Knights' Iron Shield, Merciless Gladiator's Dagger, Norrwen's Bloodstring Lyra, Runedil's Goldentune Harp, Thoughtful Sage's Jewel |
| Medusa | Swamp of Calmness invasion | 1 of 7: Ancient Icarus Scroll, Antonia's Sword, Arca's Prophecy, Empire Guardians' Stronghold, Kundun's Madness Blade, Kundun's Magic Spell Scroll, Kundun's Seal Scroll |
| Lord of Ferea | boss | 1 of 8: Ancient Icarus Scroll, Antonia's Sword, Arca's Prophecy, Kundun's Seal Scroll, Lemuria's Orb, Norrwen's Bloodstring Lyra, Runedil's Goldentune Harp, Thoughtful Sage's Jewel |
| Nix | Boss Battle event | 1 of 8: Ancient Icarus Scroll, Antonia's Sword, Arca's Prophecy, Kundun's Seal Scroll, Lemuria's Orb, Norrwen's Bloodstring Lyra, Runedil's Goldentune Harp, Thoughtful Sage's Jewel |
| God of Darkness | Boss Battle event | 1 of 4: Antonia's Sword, Lemuria's Orb, Norrwen's Bloodstring Lyra, Runedil's Goldentune Harp |
| Deep Dungeon Gorgon | Deep Dungeon 5 | 1 of 4: Antonia's Sword, Lemuria's Orb, Norrwen's Bloodstring Lyra, Runedil's Goldentune Harp |
| Core Magriffy | boss reward | 1 of 15: Ancient Icarus Scroll, Antonia's Sword, Arca's Prophecy, Empire Guardians' Stronghold, Gladiator's Dagger, Iron Shield of the Magic, Kundun's Madness Blade, Kundun's Magic Spell Scroll, Kundun's Seal Scroll, Lemuria's Orb, Lorencia Knights' Iron Shield, Merciless Gladiator's Dagger, Norrwen's Bloodstring Lyra, Runedil's Goldentune Harp, Thoughtful Sage's Jewel |
| Lord Silvester | Boss Fight event | 1 of 7: Ancient Icarus Scroll, Antonia's Sword, Arca's Prophecy, Empire Guardians' Stronghold, Kundun's Madness Blade, Kundun's Magic Spell Scroll, Kundun's Seal Scroll |
Event monsters and rewards
| Source | Type | Pentagram pool |
|---|---|---|
| Green Sheep | event monster | 1 of 4: Antonia's Sword, Lemuria's Orb, Norrwen's Bloodstring Lyra, Runedil's Goldentune Harp |
| White Monkey | event monster | 1 of 8: Ancient Icarus Scroll, Antonia's Sword, Arca's Prophecy, Kundun's Seal Scroll, Lemuria's Orb, Norrwen's Bloodstring Lyra, Runedil's Goldentune Harp, Thoughtful Sage's Jewel |
| Protection of Acheron | event reward | 1 of 7: Ancient Icarus Scroll, Antonia's Sword, Arca's Prophecy, Empire Guardians' Stronghold, Kundun's Madness Blade, Kundun's Magic Spell Scroll, Kundun's Seal Scroll |
| Monster Soul Converter | mission rewards, options 1 to 5 | 1 of 19: Ancient Icarus Scroll, Antonia's Sword, Arca's Prophecy, Brave Hero Elixir, Empire Guardians' Stronghold, Gladiator's Dagger, Hero Elixir, Iron Shield of the Magic, Kundun's Madness Blade, Kundun's Magic Spell Scroll, Kundun's Seal Scroll, Lemuria's Orb, Lorencia Knights' Iron Shield, Merciless Gladiator's Dagger, Muren's Book of Magic, Norrwen's Bloodstring Lyra, Runedil's Goldentune Harp, Scroll of Etramu, Thoughtful Sage's Jewel |
Items you open
| Source | Type | Pentagram pool |
|---|---|---|
| Pandora Box | 1 of 15: Ancient Icarus Scroll, Antonia's Sword, Arca's Prophecy, Empire Guardians' Stronghold, Gladiator's Dagger, Iron Shield of the Magic, Kundun's Madness Blade, Kundun's Magic Spell Scroll, Kundun's Seal Scroll, Lemuria's Orb, Lorencia Knights' Iron Shield, Merciless Gladiator's Dagger, Norrwen's Bloodstring Lyra, Runedil's Goldentune Harp, Thoughtful Sage's Jewel | |
| Red Card | 1 of 15: Ancient Icarus Scroll, Antonia's Sword, Arca's Prophecy, Empire Guardians' Stronghold, Gladiator's Dagger, Iron Shield of the Magic, Kundun's Madness Blade, Kundun's Magic Spell Scroll, Kundun's Seal Scroll, Lemuria's Orb, Lorencia Knights' Iron Shield, Merciless Gladiator's Dagger, Norrwen's Bloodstring Lyra, Runedil's Goldentune Harp, Thoughtful Sage's Jewel | |
| Red Card [Elemental] | 1 of 15: Ancient Icarus Scroll, Antonia's Sword, Arca's Prophecy, Empire Guardians' Stronghold, Gladiator's Dagger, Iron Shield of the Magic, Kundun's Madness Blade, Kundun's Magic Spell Scroll, Kundun's Seal Scroll, Lemuria's Orb, Lorencia Knights' Iron Shield, Merciless Gladiator's Dagger, Norrwen's Bloodstring Lyra, Runedil's Goldentune Harp, Thoughtful Sage's Jewel | |
| Pentagram Box | always a Pentagram for Beginners | 1 of 1: Pentagram for Beginners |
| Group Boss Battle Bonus Box | 1 of 1: Brilliant Orb [I] |
Rarer sources without a published chance: Elemental Capsules, Goblin Treasure Boxes and the Salamander invasion.
Errtel Types
| Type | Focus |
|---|---|
| Anger | Offensive elemental damage |
| Blessing | Defensive elemental stats |
| Integrity | Balanced attack/defense |
| Divinity | Advanced combat bonuses |
| Radiance | Special effects (Bleed, Paralyze, Bind, Punish, Blind) |
Errtel Rank-Up
- Combine two Errtels of the same type + same element to rank up
- Both must be same rank with level 7+
- Left slot receives the upgrade, right slot is destroyed
- Previous options are kept - 100% success rate
Elemental Strengths & Weaknesses
A strong element deals 110% damage. A weak element takes increased damage.
| Element | Strong Against | Weak Against |
|---|---|---|
| Fire | Wind, Darkness | Water, Earth |
| Water | Fire, Earth | Wind, Darkness |
| Earth | Water, Fire | Wind, Darkness |
| Wind | Earth, Darkness | Fire, Water |
| Darkness | Water, Wind | Fire, Earth |
Chaos Machine
Overview
The Chaos Machine is the primary crafting system, operated by the Chaos Goblin NPC in Noria. It combines items and jewels to create upgrades, wings, and special equipment.
Common Combinations
| Recipe | Ingredients | Result |
|---|---|---|
| Item Upgrade (+10-+15) | Item + Jewel of Chaos + Jewel of Bless/Soul + Zen | Upgraded item or destruction |
| Wings Level 1 | +4 items with +4 option + Jewel of Chaos + Zen | Random Level 1 Wings |
| Wings Level 2 | Level 1 Wings + Jewel of Chaos + Loch's Feather + Zen | Random Level 2 Wings |
| Wings Level 3 | Level 2 Wings + Jewel of Chaos + Condor Flame + Zen | Random Level 3 Wings |
| Excellent Item | Normal item + Jewel of Chaos + Jewel of Life + Zen | Excellent grade item |
| Fruit Crafting | Jewel of Creation + Jewel of Chaos + Zen | Random stat fruit |
Tips
- Adding Jewel of Life to most combinations increases success rate
- Higher item levels and options improve combination chances
- Failed combinations may destroy all ingredients
- Check required Zen amount before combining
Blood Castle
Overview
Blood Castle is a timed PvE event where players must fight through waves of monsters, destroy the castle gate, defeat the boss, and retrieve the Archangel's weapon.
How to Enter
- Craft a Cloak of Invisibility via the Chaos Machine using a Scroll of Archangel + Blood Bone + Jewel of Chaos (all same level)
- Speak to the Archangel's Spirit NPC in Event Square
- Select the appropriate Blood Castle level for your character
Level Requirements
| Blood Castle | Level Range |
|---|---|
| BC 1 | 15 - 80 |
| BC 2 | 81 - 130 |
| BC 3 | 131 - 180 |
| BC 4 | 181 - 230 |
| BC 5 | 231 - 280 |
| BC 6 | 281 - 330 |
| BC 7 | 331 - 400 |
| BC 8 | 400+ (Post-Reset) |
Magic Gladiator and Dark Lord have their level requirement reduced by 20.
Blood Castle 8 is available for high-level post-reset players seeking greater challenges and rewards.
Objectives
- Kill monsters on the bridge to break through
- Destroy the castle gate
- Defeat the Crystal Statue boss inside
- Pick up the Archangel's weapon and return it to the NPC
Rules & Rewards
- Maximum 10 players per Blood Castle instance
- No experience loss, no Zen loss, and no item drops on death
- All survivors receive a Jewel of Chaos
- First player to return the weapon gets the best rewards
Devil Square
Overview
Devil Square is a wave-based survival event with massive monster spawns. It's one of the best events for fast leveling and jewel farming.
How to Enter
- Obtain a Devil's Eye and Devil's Key from monster drops
- Combine them with 2x Jewel of Chaos at the Chaos Machine to create a Devil's Invitation
- Speak to Charon NPC in Noria (172, 106)
Level Requirements
| Stage | Level Range |
|---|---|
| DS 1 | 15 - 80 |
| DS 2 | 81 - 130 |
| DS 3 | 131 - 180 |
| DS 4 | 181 - 230 |
| DS 5 | 231 - 280 |
| DS 6 | 281 - 330 |
Magic Gladiator and Dark Lord have their level requirement reduced by 20.
Gameplay
- Maximum 15 players per instance
- Survive waves of increasingly difficult monsters for 20 minutes
- PvP disabled - all players fight monsters only
- Death results in teleportation to Noria
- Keep all items dropped by monsters
Rewards
- Massive experience bonus based on kill score
- Jewel drops throughout the event
Chaos Castle
Overview
Chaos Castle is a last-player-standing event combining PvP and PvE. Players fight both monsters and each other on a shrinking platform - fall off and you're eliminated!
How to Enter
- Purchase an Armor of Guardsman from wandering merchants (Lorencia, Noria, Devias)
- Speak to the event NPC and pay the entry fee
- All players are disguised as identical guardsmen - no one knows who is who
Level Requirements
| Castle | Level Range | Entry Fee |
|---|---|---|
| CC 1 | 15 - 49 | 25,000 Zen |
| CC 2 | 50 - 119 | 80,000 Zen |
| CC 3 | 120 - 179 | 150,000 Zen |
| CC 4 | 180 - 239 | 250,000 Zen |
| CC 5 | 240 - 299 | 400,000 Zen |
| CC 6 | 300 - 400 | 650,000 Zen |
| CC 7 | 400+ (Post-Reset) | 1,000,000 Zen |
Chaos Castle 7 is available for high-level post-reset players, featuring stronger opponents and greater rewards.
Gameplay
- Up to 100 players per instance (minimum 1 to start)
- Everyone is an enemy - no parties allowed
- The platform shrinks based on remaining player count
- If players drop below 70, monsters disguised as players fill the gaps
- Traps activate when count drops below 50 - instant kill regardless of defense
- Damage between players reduced to 50%
- Pets and mounts disabled
Scoring & Rewards
- 2 points per monster kill, 1 point per player kill
- Last player standing wins - if time expires, highest score wins
- Winner receives 80% of the total entry fee pool plus jewels
Crywolf
Overview
Crywolf is a server-wide defense event in the southeastern Valley of Loren. All players cooperate to protect the Wolf Statue from Balgass and his army for 30 minutes.
Altar System
- Five altars surround the Wolf Statue, maintaining its protective shield
- Only Muse Elf (level 350+) characters can contract with altars
- Max 2 contracts per player - contract activates after 5 minutes
- Shield HP is tied to the contracted character's health
- Contract breaks if the Elf moves away or dies
Victory & Defeat
Victory Conditions
- At least one altar remains intact when the battle ends, OR
- Balgass is defeated
Defeat Conditions
- All altars destroyed, OR
- Balgass survives until the end
Server-Wide Effects
- On Success: Monster HP -20% server-wide, Kundun's life recovery disabled, Chaos Machine success rate +10%
- On Failure: NPCs evacuate Crywolf, Jewel of Guardian drop rate decreases
Kanturu
Overview
Kanturu is a raid event featuring the Maya boss fight. Players must progress through Kanturu zones and defeat Maya for rare crafting materials and high-tier loot.
Kanturu Zones
- Kanturu Ruins - Entry area with moderate monsters
- Kanturu Tower - Higher difficulty, better drops
- Maya Boss Room - Final encounter
Maya Boss Fight
- Multi-phase boss with increasing difficulty
- Nightmare difficulty available for higher rewards
- Requires coordinated group effort
Rewards
- Loch's Feather - Wings crafting material
- Condor Flame - Advanced wings crafting material
- Rare equipment and jewels
- Ruud bonus
Throne of Eden
Overview
Throne of Eden is a scheduled guild PvP event held in the Devias 3 Castle. Guilds compete to hold the throne - the guild whose Guild Master stands on the throne the longest wins. It runs on a fixed schedule, announced server-wide in advance. There is no UI panel to open; the event HUD appears automatically when you enter the map during an active event.
Schedule
| Day | Warning | Event | Ends |
|---|---|---|---|
| Saturday | 17:55 | 18:00 | 18:30 |
| Sunday | 19:55 | 20:00 | 20:30 |
Times are server time. Saturday’s round ends well before the Castle Siege (20:00–22:00, Valley of Loren), so the two never overlap. A warning broadcast goes out to all players five minutes before the event starts. A warning broadcast goes out to all players before the event starts - when you see it, you can click Join in the invite popup to teleport directly to Devias 3 Castle.
How It Works
- When the warning fires, a popup appears on every player’s screen: “Throne of Eden begins in X minutes!”
- Clicking Join teleports you to the castle area in Devias 3 (Map 2). You can also walk there manually.
- When the event starts, anyone already standing inside the castle zone is cleared out (teleported to the castle spawn area just outside).
- The event begins. Only Guild Masters can capture the throne by physically standing on the throne tile.
- Every 2 seconds the server scans who is on the throne:
- One GM on the throne: their guild accumulates hold time
- Multiple GMs from different guilds: CONTESTED, no time accumulates for anyone
- Nobody on the throne: Unclaimed, no time accumulates
- The event ends after the configured duration. The guild with the most total accumulated throne time wins.
The Throne Zone
Located in Devias 3 (Map 2), the castle zone covers coordinates approximately (207-242, 203-239). The throne itself is at tile (225-226, 237) - your Guild Master must be standing directly on that exact tile to accumulate time.
Non-Guild-Masters can fight in the zone and contest it physically, but only the Guild Master standing on the throne actually scores time.
In-Event HUD
When you’re in Devias 3 during an active event, a small draggable HUD appears showing:
- “THRONE OF EDEN” header with time remaining
- Your guild - current accumulated hold time + blue progress bar
- Leading guild - their accumulated hold time + gold/orange progress bar
- If contested: shows “CONTESTED!” with crossed swords icon in red
- If nobody holds it: shows “Unclaimed”
A server-wide broadcast goes out every 30 seconds showing who’s leading and how much time is left.
Rewards
| Result | Reward |
|---|---|
| Winning guild members | Ruud reward + 1-hour combat buff + control of the castle zone |
| Participating guild members (held throne for at least minimum time) | Ruud reward |
| Guilds that never held the throne | Nothing |
Victory Buff (1 Hour)
All online members of the winning guild receive a 1-hour combat buff. Exact values are subject to change.
A server-wide announcement goes out: “[GuildName] claimed the Throne of Eden! (held X:XX)”
Castle Control (Throne Guard)
The winning guild gains exclusive control of the castle area between events. Any player who is not a member of the winning guild will be instantly teleported out of the castle zone with a warning message.
- The guard activates after each event ends and stays active until the next event
- The guard automatically disables 5 minutes before the next scheduled event so all guilds can enter
- Non-members who enter the zone see: "This area belongs to [GuildName]! You have been expelled."
Golden Kundun (Castle Boss)
A Golden Kundun spawns inside the castle zone at (226, 233). This is an extremely powerful raid boss exclusive to the winning guild's territory.
| Stat | Value |
|---|---|
| Level | 800 |
| HP | 2,000,000,000 |
| Damage | 30,000 - 50,000 |
| Defense | 2,400 |
| Damage Absorption | 99% |
| Respawn | 24 hours |
Only the winning guild can access the castle area to fight this boss. It drops high-value loot from the Golden Kundun drop table.
Each kill gives 5 drops from the Golden Kundun table: Sealed Blood Angel set pieces, ancient set pieces, Ruud Box (3000), Errtel of Radiance, Talismans (Luck, Chaos, Ascension II and their elemental versions), Mysterious Stone, Condor Feather and Brown Panda Ring.
Tips
- Only the Guild Master matters for scoring - everyone else is there to protect their GM and kill enemy GMs.
- If two GMs from different guilds are both on the throne, time stops for both - contesting is a valid defensive tactic to deny the leader from accumulating more time.
- You don’t need to win to get rewarded - any guild that held the throne at all, even for a few seconds, earns a participation reward.
- The victory buff applies to all online guild members - winning pays off beyond just the Ruud reward.
- The event is purely about presence on the specific throne tile - being in the zone but not on that exact tile does nothing for scoring.
- Coordinate your guild before the event - have your GM push to the throne while guildmates clear the path.
Arca War
Overview
Arca War is a guild versus guild event fought over three contested obelisks. Registered guilds are dropped onto the battlefield at their own spawn points and spend the event tearing down towers they do not hold while defending the ones they do. Nothing is handed out on the field itself. What you take away is Trophies of Battle, and those are exchanged for the real rewards once the fighting is over.
Schedule and Registration
The event runs once a week, on Wednesday at 20:00 server time, and lasts thirty minutes.
Registration happens with Jin, the Arca War NPC in Acheron. The guild master registers the guild first, inside a five minute window, and members then have a further five minutes of their own to sign on to the roster. Only one registered member is required for a guild to field a team, so a small guild is not shut out. Jin also handles entry to the battlefield once the event is live.
Ten minutes after the event ends, anyone still standing on the battlefield is moved back out.
The Obelisks
Three Fire Tower obelisks are in play. Two of them stand in Acheron, one in the Alkmaar area and one in the Ubaid area (map 92). The third stands in Debenter (map 96).
Each obelisk carries a deep pool of health, so bringing one down is work for a coordinated group rather than a single player. An obelisk that has already been captured holds noticeably less health than an untouched one, which cuts both ways: the ground you take is cheaper for the next guild to take back off you. Holding what you have captured is worth as much as capturing it in the first place.
A destroyed obelisk does not stay down. It returns after a short delay, and the fight over it starts again from scratch.
The Battlefield
The contested areas are not empty ground. Around the two Acheron obelisks, groups of elemental spirits spawn and keep respawning through the event: Undine, Salamander, Sylphid, Gnome and Hellraiser. Debenter fields its own local creatures instead, Sellihoden, Ukanva, Silla, Normus and Muff. They are a nuisance while you are working on a tower and a real problem if an enemy guild catches you in the middle of a pull.
Trophies and Rewards
Taking part earns Trophies of Battle. They are paid out on the strength of what you contributed during the event, and the results screen at the end shows your contribution, your kill points and the trophies you walked away with.
The trophies are not the reward themselves. Afterwards you hand them back to Jin and exchange them in tiers, from a small turn-in at the bottom up to a large one at the top, and the tier you pick decides what the exchange is worth. Saving trophies is worthwhile. The smallest exchange gives a single draw from the reward pool, every tier above it draws more than once, and the size of the stacks you receive climbs steadily as the tier goes up. The largest exchanges also upgrade the headline Ruud payout to the bigger box. The exchange is a combination, and the client shows you its success rate before you confirm, so read that line before committing a stack you have been saving for weeks.
What the pool contains: upgrade and refining stones for Guardian and Mastery gear, Elemental Runes, Bless of Light, Steel of Heaven, Golden Sentence, Sealed Stone Shards, Guardian option change pieces, generous stacks of Pandora Picks, and a Ruud box.
Quantities are deliberately not listed here. The reward values are still being tuned, and a printed table would be wrong within a patch or two. The pool above is the honest answer to what you can get; how much of it is a moving number.
Notes
- Arca War runs on the Castle Siege server instance only. Both battlefield maps live there, so entering the event moves your character across for the duration and back out again afterwards.
- There is no hotkey panel for Arca War. Registration, entry and the trophy exchange all run through Jin, and the only window the event opens on its own is the results screen at the end.
- Guilds with only a handful of members can still register and still earn trophies. Contribution on the field is what pays, not guild size on paper.
The Hollow Sovereign
“Calm, ancient, quietly superior. A god who is slowly losing and refuses to admit it.”
Overview
The Hollow Sovereign is a living world boss that speaks, remembers, and issues prophecies. Every line he utters is generated in real time. He reacts to who killed him, who he killed, who’s online, and what has happened on the server recently. He is not a scripted loop of dialogue.
When he arrives, he taunts the realm:
“[The Hollow Sovereign] I have arrived.”
“[The Hollow Sovereign] <a custom line referencing the last hero who slew me>”
Rewards
Boss Kill (top-damage player)
Guaranteed items, plus a tier-rolled currency pool.
Guaranteed Drops
Jewel of Bless ×10 · Jewel of Soul ×10
| Ruud Tier | Amount | Chance |
|---|---|---|
| Common | 1,000 | 75% |
| Uncommon | 3,500 | 22.4% |
| Rare | 10,000 | 2% |
| Epic | 30,000 | 0.5% |
| Legendary | 100,000 | 0.1% |
| WCoin Tier | Amount | Chance |
|---|---|---|
| Common | 150 | 75% |
| Uncommon | 600 | 22.4% |
| Rare | 2,000 | 2% |
| Epic | 6,000 | 0.5% |
| Legendary | 20,000 | 0.1% |
Participation (players near the boss at kill time)
To qualify, you need to be on Devias and within roughly 30 tiles of the Sovereign when he falls. Hanging out in town or across the map won’t count. Show up to the fight.
Guaranteed Drops
Jewel of Bless ×3
| Ruud Tier | Amount | Chance |
|---|---|---|
| Common | 200 | 75% |
| Uncommon | 700 | 22.4% |
| Rare | 2,000 | 2% |
| Epic | 6,000 | 0.5% |
| Legendary | 20,000 | 0.1% |
Nemesis Bonus
If the Sovereign has recognized you as his nemesis before this fight, slaying him again grants an extra Jewel of Creation ×5. You earn nemesis status by accumulating the most total kills on him across all players.
The Nemesis System
Every time you kill the Sovereign, he remembers. The player with the most cumulative kills becomes his nemesis. The Sovereign’s taunts, death lines, and prophecies will personally acknowledge you. From that point on, every time you fell him again, the nemesis bonus fires.
Prophecies
Every 60 minutes, the Sovereign issues a riddle. Each prophecy has exactly one goal: kill a specific monster, anywhere in the world, before the prophecy expires (60 minutes).
Example:
“[The Hollow Sovereign] The frostbound sentinel slumbers where mortals fear the ice.”
Decoding this might send you hunting an Ice Monster in Devias or an Ice Walker in Raklion. The riddle always hints at the target’s name.
How Targets Are Chosen
The Sovereign draws from a wide pool of creatures spanning every major map, from the lowliest vermin of the starter zones to the elite horrors of endgame territory. The specific target is never named directly. You have to read the riddle and figure out what he means.
He also pays attention to where players already are. If a map is busy with active players, he’ll tend to send you somewhere quieter, so expect to travel off the beaten path. The difficulty of the riddle scales with the reward tier: easier prophecies send you to familiar creatures, harder ones demand you track down something obscure.
Listen carefully. Every riddle contains a hint at the target’s name or nature.
Prophecy Rewards
Difficulty scales the currency pool. All currency pools follow the same five-tier curve (Common 75% down to Legendary 0.1%).
| Difficulty | Guaranteed Drops | Currency Pool |
|---|---|---|
| Easy | Jewel of Bless ×5 | Ruud 100 - 10,000 |
| Medium | Jewel of Bless ×10 + Jewel of Soul ×10 | Ruud 200 - 20,000 |
| Hard | Jewel of Bless ×30 + Jewel of Soul ×30 + Jewel of Creation ×10 | Ruud 400 - 40,000 · WCoin 60 - 8,000 |
Failing a Prophecy
If the riddle expires unfulfilled, the Sovereign reacts with quiet contempt. No reward, and the kill tracker resets for the next cycle.
Tips
- Check the bottom-middle chat area for the Sovereign’s arrival notice and prophecy riddles.
- Rewards display the tier name inline. Look for (Rare), (Epic), (Legendary) notices after a kill or fulfillment.
- Solo farming the Sovereign builds nemesis kills quickly; once you’re the nemesis, every repeat kill adds the Jewel of Creation bonus.
- Party up for the kill. Participation rewards go to every player fighting nearby when he falls, not just the top damager, but you have to actually be at the fight.
World Bosses
Ten unique threats stalking the highest-tier maps. Hunt them on cooldown for jewels, currency, and a vanishingly rare chance at Ring of Power or Ring of Volt.
Roster
Each map hosts exactly one boss at a fixed spawn point, visible as a BOSS ZONE marker on the map's minimap. Hover a boss with a ▶ marker to preview it in action.
| Tier | Boss | Map | Coord | Cooldown |
|---|---|---|---|---|
| S | The Aquilas Sovereign | Aquilas Temple (145) | (235, 157) | 20-28h |
| S | Doomwarden Mire | Swamp of Doom (144) | (73, 103) | 20-28h |
| A | Kardamahal Tyrant | Kardamahal Underground (143) | (107, 11) | 10-14h |
| A | Tormenta Stormlord | Tormenta Island (141) | (99, 104) | 10-14h |
| A | Tarkan Inheritor | Blood Tarkan (140) | (128, 39) | 10-14h |
| B | Ignis Magmaforge | Ignis Volcano (138) | (175, 96) | 5-7h |
| B | Kanturu Lich | Kanturu Underground (137) | (162, 138) | 5-7h |
| B | Blaze Sovereign | Blaze Kethotum (136) | (123, 29) | 5-7h |
| B | Kethotum Relic-Keeper | Old Kethotum (135) | (162, 12) | 5-7h |
| B | Aida Mourner | Ashen Aida (134) | (73, 17) | 5-7h |
How Rewards Work
Damage is tracked across the fight. Two reward buckets pay out when the boss dies:
- Top damage. the player who dealt the most damage gets the biggest bundle: a floor of guaranteed jewels, plus weighted-pool rolls on Ruud, WCoin, and two independent ring chances.
- Participation. every player who contributed meaningful damage gets a smaller bundle: floor jewels and weighted-pool currency rolls.
On top of that, the boss makes two extra ring rolls per kill. If either hits, the recipient is picked at random weighted by damage dealt; so the more you contributed, the better your odds. Showing up matters.
Tier-Scaled Drops
All jewels listed below are guaranteed (no roll needed) per bucket. Higher tiers grant more types and larger stacks.
| Tier | Top-damage jewels (guaranteed) | Participation jewels (guaranteed) | Ring chance (per roll) |
|---|---|---|---|
| S | Bless ×40 · Soul ×30 · Life ×10 · Chaos ×10 · Creation ×6 · Guardian ×4 · Harmony ×3 · Gemstone ×5 · Imperial Reinforcement Stone ×10 · Shining Imperial Reinforcement Stone ×4 | Bless ×10 · Soul ×6 · Life ×3 · Chaos ×2 | 0.6% RoP, 0.6% RoV |
| A | Bless ×25 · Soul ×18 · Life ×6 · Chaos ×6 · Creation ×3 · Guardian ×2 · Harmony ×1 · Temple Guard Enhancement Stone ×10 · Shining Temple Guard Enhancement Stone ×4 | Bless ×6 · Soul ×4 · Life ×1 | 0.3% RoP, 0.3% RoV |
| B | Bless ×15 · Soul ×10 · Life ×4 · Chaos ×3 · Creation ×1 | Bless ×3 · Soul ×2 | 0.1% RoP, 0.1% RoV |
Currency pools (Ruud + WCoin) follow a five-tier weighted curve: Common 60% · Uncommon 28% · Rare 8% · Epic 3% · Legendary 1%. Tier S Legendary Ruud goes up to 200,000; Tier B caps lower.
Spawn Announcement
When a boss respawns, a server-wide notice fires so everyone knows the hunt is on:
"[World Boss] I, The Aquilas Sovereign, have arrived in Aquilas Temple. Come find me!"
Each boss names itself and the map it's haunting, so you can decide whether the trip is worth your time.
Ring of Power & Ring of Volt
Both rings come from two places. World bosses roll them with extreme rarity: 0.6% per kill on a Tier S boss, 0.3% on Tier A, 0.1% on Tier B, once for the top damage dealer and once more across everyone who took part. Priest James also sells them for 100,000,000 Ruud in every class tab. They're unique-equip, level 400 required, all classes. Server-wide, expect roughly one boss ring every two to three weeks across the whole roster, regardless of how many players show up to each kill.
A boss ring arrives clean: +0, no luck, no excellent options. The Ruud shop ring comes with six excellent options and a 35% luck chance. Either way the ring can be built up with Volt Jewels from the shared tab of the Ruud shop: the Excellent line adds one random excellent option per success (up to six), the Additional line raises the +4 option step by step, at 70% / 50% / 30% for the Volt, Greater and Supreme tiers.
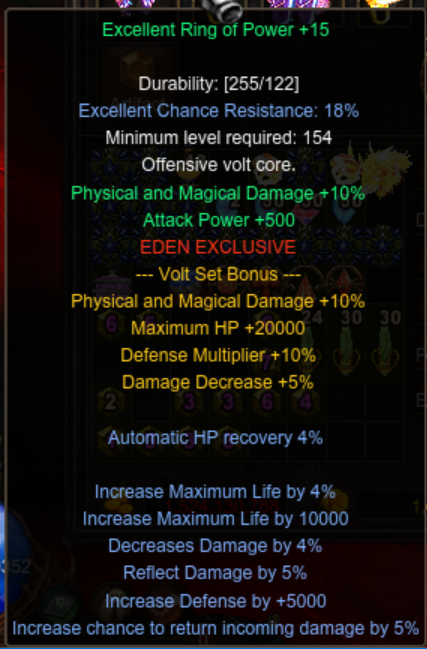
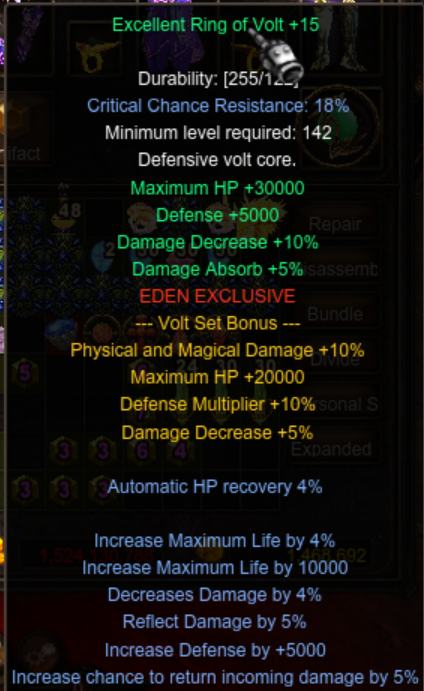
When a ring drops, the bearer is announced to the entire server:
“✦ Ring of Volt has chosen [PlayerName] as its bearer!”
Tips
- The boss is alive on the map at server start. After kill, the cooldown runs server-side; check periodically.
- You don't have to land the killing blow to be top damage. Sustained DPS over the fight wins.
- Participation requires real damage during the fight. Tagging the boss once won't count.
- Tier B bosses respawn every ~6 hours, ideal for daily routines. Tier S is the once-per-day prestige fight.
Gens System
Overview
The Gens system divides players into two factions: Duprian and Vanert. Members earn Contribution Points by killing opposing faction players, climbing the Gens Ranking.
How to Join
- Reach level 50
- Visit the faction NPC:
- Gens Duprian - Steward in Lorencia (144, 127)
- Gens Vanert - Reicht in Noria (167, 100)
- Cannot join both factions simultaneously
- Contribution points reset when leaving a faction
Contribution Points
- Earned by killing opposing faction players in PvP zones
- Higher-ranked kills award more points
- Points determine your Gens Rank (Private to Grand Marshal)
- Press B to check your Gens information
Benefits
- Access to faction-specific events
- Gens Ranking rewards
- PvP-enabled in Vulcanus for faction warfare
Duels
Overview
The Duel Arena in Vulcanus offers friendly 1v1 PvP battles with up to 4 simultaneous rooms per server. Perfect for testing builds and learning combos.
How to Duel
- Travel to Vulcanus
- Enter the Duel Arena (Colosseum)
- Challenge another player or accept a challenge
- Fight in a dedicated duel room
Rewards
- Gladiator's Honor Buff - 60-minute buff for the winner
- No penalties for losing
- Great for practice without risk
Castle Siege
Overview
Castle Siege is the ultimate guild warfare event. Guilds battle for control of the castle in a weekly large-scale PvP war. The winning guild controls the castle, earns taxes, and receives exclusive rewards.
Requirements
- Guild Master must be level 400+
- Guild must have 3+ members
Weekly Schedule (server time)
| Phase | Schedule |
|---|---|
| Guild Registration | Monday 23:59 – Thursday 12:00 |
| Mark of Lord Registration | Thursday 12:00 – 19:00 |
| Announcement | Thursday 19:00 – Saturday 20:00 |
| Warfare | Saturday 20:00 – 22:00 |
| Siege end & settlement | Saturday 22:00 – Sunday 00:00 |
Battle Mechanics
- Objective: Attackers must stamp the Guild Master's seal on the pedestal in the Dragon Tower (30 second channel with 2 holders)
- No PK penalties between attacking and defending guilds in Valley of Loren
- Attackers can place Life Stones as respawn points (crafted via Chaos Machine)
- Castle has 3 upgradeable gates and 4 guardian statues that must all be destroyed to access the Dragon Tower
Castle Owner Benefits
- Tax collection from server activities (max 50,000,000 Zen per withdrawal)
- Ability to upgrade castle gates and guardian statues for defense
- Access to exclusive castle areas and NPCs
Lorencia PvP Rectangle
Overview
A designated PvP combat zone located in Lorencia. When a player with more than 50 resets enters the rectangle, they are locked inside for 10 seconds and cannot leave until the timer expires. Players with 50 or fewer resets can pass through freely.
Purpose: Prevents hit-and-run tactics. Players who enter the PvP zone must commit to the fight - no running in for a quick attack and escaping before the opponent can retaliate.
How It Works
- Enter the rectangle and a 10-second lock timer starts
- A gold notification appears: "You are locked for 10 seconds"
- Any attempt to leave before the timer ends will teleport you back to the center of the rectangle
- After 10 seconds, a green notification appears: "You may now exit the rectangle"
- You are free to leave
Rules
- Only affects players with more than 50 resets
- PvP is enabled inside the rectangle at all times
- If you attempt to leave early, you are pulled back to center
- After the lock expires, you have a 5-second grace period to exit before the lock can trigger again
In-Game Commands
Player Commands
| Command | Description |
|---|---|
| /move [map] | Teleport to a map (e.g. /move lorencia) |
| /post [message] | Send a server-wide message (level/reset/zen requirement) |
| /reset | Reset your character (requires level 400 + 100M zen) |
| /mreset | Master reset (grand reset) |
| /addstr [points] | Add stat points to Strength |
| /addagi [points] | Add stat points to Agility |
| /addvit [points] | Add stat points to Vitality |
| /addene [points] | Add stat points to Energy |
| /addcmd [points] | Add stat points to Command (Dark Lord only) |
| /pkclear | Clear your PK status and kill count |
| /ware <number> | Switch between your warehouse vaults. How many you have depends on your VIP tier |
| /openware | Open the Warehouse from where you stand, no NPC needed |
| /openware chaos | Open the Chaos Machine from where you stand |
| /openware elf | Open the Elf Soldier (buffs) from where you stand |
| /openware chaoscard | Open the Chaos Card Master from where you stand |
| /clearinv | Clear your entire inventory |
| /clearextinv | Clear your extended inventory |
| /cleareventinv | Clear your event inventory |
| /clearinvmuun | Clear your Muun inventory |
| /store | Open personal store |
| /offstore | Enable offline store (stay online as shop) |
| /offattack | Enable offline attack mode |
| /evo | Change your character class (evolution) |
| /re | Toggle auto-accept party/guild requests |
Warehouse
Every account has more than one warehouse vault, and each one is a separate set of slots with its own Zen. Type /ware followed by the vault number to switch, for example /ware 2. The vault you are on stays selected until you switch again.
| VIP tier | Warehouse vaults |
|---|---|
| Free | 1 |
| Bronze | 2 |
| Silver | 3 |
| Premium | 5 |
Items left in a vault stay there if your VIP expires, but you can only reach the vaults your current tier allows, so move anything you need out of the higher vaults before a tier runs out.
Opening NPCs from where you stand
/openware opens an NPC window without walking to the NPC. It works anywhere except the event maps listed below.
| Command | Opens | Also accepts |
|---|---|---|
| /openware | Warehouse | warehouse, ware, wh |
| /openware chaos | Chaos Machine | mix |
| /openware elf | Elf Soldier (buffs) | buff |
| /openware chaoscard | Chaos Card Master | card |
Requirements: level 200, or at least one reset. There is a 5 second cooldown between uses.
Blocked on: Devil Square, Blood Castle, Chaos Castle, Illusion Temple, Castle Siege, Doppelganger and Imperial Guardian. Use the NPC in town before you enter.
Hotkeys
| Key | Function |
|---|---|
| F3 | Runic Forge |
| F4 | Ancient Insignia |
| F6 | PvP Bounty Board |
| F7 | The Crucible (Ranked Arena) |
| F10 | Jewel Warehouse (Stash) |
| B | Gens information |
Custom System Commands
| Command | Description |
|---|---|
| /bounty | Open the PvP Bounty panel |
| /lms join | Join Last Man Standing event |
| /lms status | Check LMS event status |
| /milestones | View your reset milestone rewards progress |
Important Notes
- /clearinv is permanent and irreversible - all items in your inventory will be deleted
- /post has a cooldown and zen cost to prevent spam
- Stat commands (/addstr, etc.) accept a number of points to add at once
- Some commands require minimum level or reset count to use
Leveling Zones
Early Game (Level 1 - 400)
| Level | Map | Notes |
|---|---|---|
| 1 - 50 | Lorencia | Starting zone, safe for all classes |
| 30 - 80 | Noria | Good for ranged classes, early jewel drops |
| 60 - 150 | Devias | Mid-level hunting, ice monsters |
| 100 - 250 | Dungeon | Underground maps, increasing difficulty |
| 150 - 350 | Lost Tower | Great experience, moderate danger |
| 1 - 40 | Elbeland | Beginner area, alternative to Lorencia |
| 250 - 400 | Atlans / Tarkan | High-level pre-reset zones |
| 280 - 350 | Swamp of Calmness | Mid-high level hunting zone |
| 300 - 380 | Raklion | Ice-themed zone with boss encounter |
| 350 - 400 | Karutan 1-2 | High-level zones before reset |
Mid Game (Level 400 - 600)
| Level | Map | Notes |
|---|---|---|
| 400+ | Ferea (Easy) | Post-reset starting zone |
| 400+ | Kanturu Ruins | Good drops, moderate difficulty |
| 500+ | Aida | Strong monsters, good experience |
Late Game (Level 600+)
| Level | Map | Notes |
|---|---|---|
| 600+ | Ferea (Hard) | Upgraded monsters, better drops |
| 800+ | Kanturu Tower | Endgame dungeon content |
| 1000+ | Vulcanus | PvP zone with Gens content |
| 1450+ | Distorted Karutan | Elemental hunting zone |
Tips
- Use party play for faster experience in harder zones
- Check your element matchup against monsters (Pentagram system)
- Events like Devil Square and Blood Castle give more XP per hour than grinding
Wings
Overview
Wings are powerful equipment that provide damage bonuses, damage absorption, defense, and special effects. They are crafted through the Chaos Machine and progress through 5 tiers.
Wing Tiers
| Tier | Crafting Materials |
|---|---|
| Level 1 | +4 items with +4 options + Jewel of Chaos + Zen |
| Level 2 | Level 1 Wings + Jewel of Chaos + Loch's Feather + Zen |
| Level 3 | Level 2 Wings + Jewel of Chaos + Condor Flame + Zen |
| Level 4 | Level 3 Wings + additional rare materials |
| Level 5 | Level 4 Wings + 5th Wings Relic + Higher Magic Stone (Chaos Machine) |
Level 1 Wings
Satan Wings, Heaven Wings, Fairy Wings
Level 2 Wings
Mystery Wings, Dragon Wings, Archangel Wings, Darkness Wings, Spirit Wings, Despair Wings, Cape of Lord
Level 3 Wings (by Class)
| Class | Wings |
|---|---|
| Dark Knight | Wing of Storm |
| Dark Wizard | Wing of Eternal |
| Fairy Elf | Wing of Illusion |
| Summoner | Wing of Dimension |
| Magic Gladiator | Wing of Ruin |
| Dark Lord | Cape of Emperor |
| Rage Fighter | Cape of Overrule |
| Grow Lancer | Cloak of Transcendence |
| Rune Wizard | Wings of Disillusion |
| Slayer | Wings of Silence |
| Gun Crusher | Wings of Accuracy |
| Lemuria | Wings of Lemuria |
| Light Wizard | Wings of Light |
| Illusion Knight | Wings of Mirage |
| Alchemist | Wings of Alchemy |
| Crusader | Wings of Crusade |
Level 4 Wings (by Class)
| Class | Wings |
|---|---|
| Dark Knight | Wings of Flame God |
| Dark Wizard | Wings of Elysium |
| Fairy Elf | Wing of Celestial Body |
| Summoner | Wings of Other World |
| Magic Gladiator | Wings of Annihilation |
| Dark Lord | Cloak of Dominator |
| Rage Fighter | Cloak of Judgment |
| Grow Lancer | Cloak of Isolation |
| Rune Wizard | Wings of Destiny |
| Slayer | Wings of Conviction |
| Gun Crusher | Wings of Bloodshed |
| Lemuria | Wings of Arcana |
| Light Wizard | Wings of Luminous |
| Alchemist | Wings of Transmutation |
| Crusader | Wings of Sacred |
| Illusion Knight | Wings of Illusion |
Level 5 Wings (by Class)
The 5th and highest wing tier, requiring character Level 1200. One wing exists per class.
| Class | Wings |
|---|---|
| Dark Knight | Wings of Destruction |
| Dark Wizard | Wings of Virtue |
| Fairy Elf | Wings of Illusion |
| Summoner | Wings of Barrier |
| Magic Gladiator | Wings of Punishment |
| Dark Lord | Cloak of Authority |
| Rage Fighter | Cloak of Oath |
| Grow Lancer | Cloak of Training |
| Rune Wizard | Wings of Inevitability |
| Slayer | Wings of Lilac |
| Gun Crusher | Wings of Crimson |
| White Wizard | Cloak of Glory |
| Lemuria | Wings of Eternity |
| Illusion Knight | Cloak of Perfection |
| Alchemist | Wings of Purit |
Key Material Sources
- Loch's Feather - Drops from Maya boss (Kanturu)
- Condor Flame - Drops from Maya Nightmare (Kanturu)
How to Obtain Wings
- Craft (Chaos Machine): the main path. Combine the base items / lower-tier wings with Jewel of Chaos and the tier materials above, at the Chaos Goblin.
- Goblin-Point shop: 3rd-tier wings and capes (Wing of Eternal, Wing of Storm, Wing of Illusion, Wing of Ruin, Cape of Emperor, Wing of Dimension, Cape of Overrule, Cloak of Transcendence, and more) can be bought outright with Goblin Points, earned from events.
- Events & invasions: the Kanturu bosses (Maya / Maya Nightmare) drop the key crafting feathers; farming and event participation build up the materials and Goblin Points you need.
Jewels
Overview
Jewels are core crafting and enhancement materials used throughout the game. They can be stacked in bundles of 10 and 30 for efficient storage and trading.
Jewel Types
| Jewel | Primary Use | Notes |
|---|---|---|
| Jewel of Bless | Item upgrade +0 to +6 | 100% success rate |
| Jewel of Soul | Item upgrade +0 to +9 | 70% success (95% with Luck) |
| Jewel of Chaos | Chaos Machine combinations | Required for almost all crafting |
| Jewel of Life | Upgrade item normal options | 50% success rate |
| Jewel of Creation | Fruits, pet resurrection, sockets | Multi-purpose crafting jewel |
| Jewel of Guardian | Castle defenses, special options | Castle Siege materials |
| Jewel of Harmony | Add yellow bonus options to items | Works on socket and set items |
Custom Jewels
Eden adds a set of custom jewels that upgrade a single property of an item in one guaranteed or high-chance step, instead of grinding stacks of the vanilla jewels. Each jewel targets one slot and one effect.
| Jewel | Effect | Applies To |
|---|---|---|
| Jewel of Level | Raises the item's level by +1 (up to +15) | Normal to Lightning tier gear |
| Jewel of Skill | Adds the Skill option to a weapon | Weapons |
| Jewel of Luck | Adds the Luck option (+crit chance, +jewel success) | Weapons and armor |
| Jewel of Weapon Excellent | Adds one random excellent option to a weapon | Normal to Lightning tier gear |
| Jewel of Armor Excellent | Adds one random excellent option to armor | Normal to Lightning tier gear |
| Jewel of Socket | Adds one socket slot to a socketable item | Socket items |
| Jewel of Dark Life | Raises the item's option to maximum in one step | Legendary only (Temple Guard / Imperial) |
| Legendary Weapon Excellent | Adds one random excellent option to a legendary weapon | Legendary only (Temple Guard / Imperial) |
| Legendary Armor Excellent | Adds one random excellent option to legendary armor | Legendary only (Temple Guard / Imperial) |
Volt Jewels are a separate line of accessory jewels for rings, pendants and earrings. See the Accessories notes for their tiers and success rates.
Where custom jewels drop
Custom jewels drop from monsters on any map. The stronger the jewel, the higher the monster level it starts at and the rarer it is. Once a jewel starts dropping, every higher-level monster keeps dropping it.
| Jewel | Drops from monster level | First maps | Rarity (vs Jewel of Bless) |
|---|---|---|---|
| Jewel of Luck | 47+ | Lost Tower | 8x rarer |
| Jewel of Skill | 47+ | Lost Tower | 8x rarer |
| Jewel of Level | 72+ | Tarkan, Aida, Icarus | 12x rarer |
| Jewel of Socket | 100+ | Karutan, Swamp of Calmness, Raklion | 20x rarer |
| Jewel of Weapon Excellent | 140+ | Deep Raklion, Deep Dungeon | 40x rarer |
| Jewel of Armor Excellent | 140+ | Deep Raklion, Deep Dungeon | 40x rarer |
| Jewel of Dark Life | 380+ | Kubera Mine | 80x rarer |
| Legendary Weapon Excellent | 470+ | Scorched Canyon | 200x rarer |
| Legendary Armor Excellent | 470+ | Scorched Canyon | 200x rarer |
Refining Stones
- Low Refining Stone - Increases Harmony options (10% success)
- High Refining Stone - Increases Harmony options (50% success)
- Also used for pet resurrection and Socket system
Other Materials
- Gemstone - Material for creating Jewel of Harmony
- Bundled Jewels - Stack 10 or 30 jewels into a single item for trading
Legendary Equipment
Overview
Legendary equipment is the highest tier of craftable gear, above Mastery. There are two tiers: 1st Legendary (Temple Guard) crafted from 10th Mastery Lightning gear, and 2nd Legendary (Imperial) crafted from maxed Temple Guard gear. Both have 100% crafting success rate.
1st Legendary - Temple Guard
Equip requirement: Level 1,300 (weapons and armor).
Crafting Requirements
| Type | Base Item | Material | Jewels | Zen |
|---|---|---|---|---|
| Weapons / Shields | +15 Lightning weapon with 16 options | Temple Guard Anvil (150,000 Ruud) | 30 JoB, 30 JoS, 1 JoC, 1 JoCr | 500,000,000 |
| Armor | +15 Lightning armor with 16 options | Temple Guard Soul (75,000 Ruud) | 30 JoB, 30 JoS, 1 JoC, 1 JoCr | 200,000,000 |
Success rate: 100%. Result: +0 Stage 1 Temple Guard item. Luck and Excellent options preserved.
Evolution System
- Equipment progresses from +0 Stage 1 to +15 Stage 5 (75 total evolutions)
- Each level has 5 stages - must complete all stages before advancing to next level
- Uses Temple Guard Upgrade Stones (from Kardamahal Underground Temple monsters)
- Success rates: 50% base, 60% with Luck, 70% with Luck + Talisman
- Failed upgrades cause stage regression - items are never destroyed
Weapons (20 Types)
| Weapon | Class |
|---|---|
| Temple Guard Sword / Belief Sword | Dark Knight |
| Temple Guard Wizard Staff | Dark Wizard |
| Temple Guard Bow / Quiver | Fairy Elf |
| Temple Guard Magic Sword / Two-Handed Sword / Magic Staff | Magic Gladiator |
| Temple Guard Scepter | Dark Lord |
| Temple Guard Stick / Book | Summoner |
| Temple Guard Claw | Rage Fighter |
| Temple Guard Lance | Grow Lancer |
| Temple Guard Rune Mace | Rune Wizard |
| Temple Guard Short Sword | Slayer |
| Temple Guard Magic Gun | Gun Crusher |
| Temple Guard Blade | Illusion Knight |
| Temple Guard WW Staff / Magic Book | Light Wizard |
| Temple Guard Orb | Lemuria |
| Temple Guard Alchemic Staff | Alchemist |
| Temple Guard Crusade Mace | Crusader |
Shields (4 Types)
Dark Knight, Fairy Elf, Dark Lord, Grow Lancer
Armor Sets (17 Variants)
Each class has a Sanctuary Temple Guard set (Helm, Armor, Pants, Gloves, Boots). Elf has AGI/ENE variants, Magic Gladiator has Knight/Wizard variants.
Excellent Options
- Fixed: Excellent DMG rate +10%
- Random (1-2): ATK Speed +100, HP/8 on kill, MP/8 on kill, +3.4 ATK per 20 levels, +97 ATK
2nd Legendary - Imperial
Imperial equipment is the ultimate endgame gear, requiring fully maxed Temple Guard items to craft. Equip requirement: Level 1,400 (weapons and armor).
Crafting Requirements
| Type | Base Item | Material | Jewels | Zen |
|---|---|---|---|---|
| Weapons / Shields | +15 Stage 5 Temple Guard weapon | Imperial Moru (Ruud) | 30 JoB, 30 JoS, 1 JoC, 1 JoCr | 500,000,000 |
| Armor | +15 Stage 5 Temple Guard armor | Imperial Soul (Ruud) | 30 JoB, 30 JoS, 1 JoC, 1 JoCr | 200,000,000 |
Success rate: 100%. Result: +0 Stage 1 Imperial item.
Evolution System
- Same +0 Stage 1 to +15 Stage 5 progression as Temple Guard
- Uses Imperial Reinforcement Stones (from Aquilas Temple monsters)
- 12 stones per upgrade attempt + 1 JoB, 1 JoS, 2 JoL + 10,000,000 Zen
- Success rates: 50% base, 60% with Luck, 70% with Luck + Talisman
- Shining Imperial Reinforcement Stones (event): 60% base, 80% max
- Failed upgrades cause stage regression - items are never destroyed
Weapon Options
- Excellent damage chance +10%
- Attack/Magic speed +100
- HP/8 on monster kill
- +3.6 ATK per 20 levels
- +102 attack power
Shield Options
- +3.6 defense per 20 levels
- 5% damage reflection
- 10% defense success increase
- +396 max life/mana
- -108 damage reduction
Armor Sets (19 Variants)
All classes available, including Alchemist. Dark Knight has Night/Faith variants, Fairy Elf has two variants, and Magic Gladiator has two variants.
Mastery Equipment
Overview
Mastery equipment is the endgame gear progression system. Weapons and armor advance through 10 mastery tiers, while accessories (earrings) advance through 8 tiers. Each tier is crafted by upgrading the previous tier's equipment at the Chaos Goblin NPC in Noria (180, 99) using tier-specific materials purchased from Priest James in Elbeland (32, 239).
All crafts from 2nd tier onward have 100% success rate. The result resets to +0 / 0 Options, but Luck and Excellent options are preserved. Base item must be at +11 with 16+ options.
Weapon Mastery Tiers
| Tier | Name | Level | Material (Anvil) | Ruud | Jewels |
|---|---|---|---|---|---|
| 1st | Bloodangel | 400 | Purchased from Ruud Shop | - | - |
| 2nd | Darkangel | 500 | Darkangel Anvil | 100,000 | 30 JoB, 30 JoS, 1 JoC, 1 JoCr |
| 3rd | Holyangel | 600 | Holyangel Anvil | 100,000 | 30 JoB, 30 JoS, 1 JoC, 1 JoCr |
| 4th | Soul | 700 | Soul Anvil | 100,000 | 30 JoB, 30 JoS, 1 JoC, 1 JoCr |
| 5th | Blue Eye | 700 | Blue Eye Anvil | 100,000 | 30 JoB, 30 JoS, 1 JoC, 1 JoCr |
| 6th | Silver Heart | 800 | Silver Heart Anvil | 100,000 | 30 JoB, 30 JoS, 1 JoC, 1 JoCr |
| 7th | Manticore | 900 | Manticore Anvil | 100,000 | 30 JoB, 30 JoS, 1 JoC, 1 JoCr |
| 8th | Brilliant | 1,000 | Brilliant Anvil | 100,000 | 30 JoB, 30 JoS, 1 JoC, 1 JoCr |
| 9th | Apocalypse | 1,100 | Apocalypse Anvil | 100,000 | 30 JoB, 30 JoS, 1 JoC, 1 JoCr |
| 10th | Lightning | 1,200 | Lightning Anvil | 100,000 | 30 JoB, 30 JoS, 1 JoC, 1 JoCr |
JoB = Jewel of Bless, JoS = Jewel of Soul, JoC = Jewel of Chaos, JoCr = Jewel of Creation
10th Mastery Weapon Stats (Lightning)
| Class | Weapon | ATK Range | Special |
|---|---|---|---|
| Dark Knight | Sword | 880-895 | Combat Power 85% |
| Dark Wizard | Staff | 305-314 | Wizardry 197% |
| Fairy Elf | Bow | 1366-1409 | ATK Speed 55 |
| Magic Gladiator | Magic Sword | 880-890 | Wizardry 102% |
| Dark Lord | Scepter | 1001-1025 | Combat Power 143% |
| Summoner | Stick | 284-307 | Wizardry 176% |
| Rage Fighter | Claw | 786-806 | Combat Power 91% |
Fixed Excellent Options (10th Mastery)
- Excellent damage boost +10%
- Attack/Magic speed +100
- HP/8 and MP/8 recovery on kill
- +3.2 to primary stat per 20 levels
- +91 to primary stat
Armor Mastery Tiers
| Tier | Name | Level | Material (Soul) | Ruud | Jewels |
|---|---|---|---|---|---|
| 1st | Bloodangel | 400 | Purchased from Ruud Shop | - | - |
| 2nd | Darkangel | 500 | Darkangel Soul | 50,000 | 30 JoB, 30 JoS, 1 JoC, 1 JoCr |
| 3rd | Holyangel | 600 | Holyangel Soul | 50,000 | 30 JoB, 30 JoS, 1 JoC, 1 JoCr |
| 4th | Soul | 700 | Soul Crystal | 50,000 | 30 JoB, 30 JoS, 1 JoC, 1 JoCr |
| 5th | Blue Eye | 700 | Blue Eye Soul | 50,000 | 30 JoB, 30 JoS, 1 JoC, 1 JoCr |
| 6th | Silver Heart | 800 | Silver Heart Soul | 50,000 | 30 JoB, 30 JoS, 1 JoC, 1 JoCr |
| 7th | Manticore | 900 | Manticore Soul | 50,000 | 30 JoB, 30 JoS, 1 JoC, 1 JoCr |
| 8th | Brilliant | 1,000 | Brilliant Soul | 50,000 | 30 JoB, 30 JoS, 1 JoC, 1 JoCr |
| 9th | Apocalypse | 1,100 | Apocalypse Soul | 50,000 | 30 JoB, 30 JoS, 1 JoC, 1 JoCr |
| 10th | Lightning | 1,200 | Lightning Soul | 50,000 | 30 JoB, 30 JoS, 1 JoC, 1 JoCr |
Armor uses Soul materials instead of Anvils. Each piece is crafted separately (Helm, Armor, Pants, Gloves, Boots).
10th Mastery Set Bonuses (Lightning)
| Pieces | Bonus |
|---|---|
| 2-Set | Mastery Skill Power increase, Mastery primary stat increase |
| 3-Set | Double damage chance +18%, Mastery ATK/Wizardry increase |
| 4-Set | Critical/Excellent damage bonus, DEF penetration +9%, damage reduction, triple damage chance |
Available Sets per Class
Each class has its own armor set. Some classes have multiple variants:
- Fairy Elf - AGI variant and ENE variant
- Magic Gladiator - Knight variant and Wizard variant
- All other classes have a single set
- Magic Gladiator has no Helm slot
- Rage Fighter has no Gloves slot
Earring Mastery Tiers
| Tier | Name | Level (L / R) | Material (Casting Mold) | Ruud | Jewels |
|---|---|---|---|---|---|
| 1st | Wrath | - / - | Purchased from Ruud Shop | - | - |
| 2nd | Forefathers | 350 / 380 | Forefathers Casting Mold | 10,000 | 20 JoB, 20 JoS, 1 JoC, 1 JoCr |
| 3rd | Glory | 500 / 550 | Glory Casting Mold | 15,000 | 20 JoB, 20 JoS, 1 JoC, 1 JoCr |
| 4th | Blood | 600 / 650 | Blood Casting Mold | 15,000 | 20 JoB, 20 JoS, 1 JoC, 1 JoCr |
| 5th | Allurement | 700 / 750 | Allurement Casting Mold | 20,000 | 20 JoB, 20 JoS, 1 JoC, 1 JoCr |
| 6th | Unity | 850 / 900 | Unity Casting Mold | 20,000 | 20 JoB, 20 JoS, 1 JoC, 1 JoCr |
| 7th | Emerald | 950 / 1,000 | Emerald Casting Mold | 25,000 | 20 JoB, 20 JoS, 1 JoC, 1 JoCr |
| 8th | Extreme Cold | 1,100 / 1,150 | Extreme Cold Casting Mold | 30,000 | 20 JoB, 20 JoS, 1 JoC, 1 JoCr |
Earrings use 20 jewels instead of 30. Left and Right earrings have different level requirements.
Earring Enhancement Success Rates
Unlike weapons and armor, earring upgrades are not always 100%. Success depends on the source earring's enhancement level:
| Source Level | Success Rate |
|---|---|
| +15 | 100% |
| +14 | 90% |
| +13 | 80% |
| +12 | 70% |
| +11 | 60% |
Earring Set Bonuses (Both L+R Equipped)
| Earring | Slot 1 | Slot 2 | Slot 3 |
|---|---|---|---|
| Wrath | Ignore Def 4% | All Stats +1 | - |
| Forefathers | Ignore Def 5% | All Stats +2 | - |
| Glory | Ignore Def 6% | All Stats +3 | - |
| Blood | Ignore Def 7% | All Stats +4 | Mastery DMG +6 |
| Allurement | Ignore Def 8% | All Stats +5 | Mastery DMG +9 |
| Unity | Ignore Def 9% | Exc Rate +6% | Mastery DMG +12 |
| Emerald | Ignore Def 10% | Exc Rate +7% | Double DMG +2% |
| Extreme Cold | Ignore Def 11% | Exc Rate +8% | Double DMG +3% |
Left Earring Options (1 of 5 randomly assigned)
| Option | Wrath | Forefathers | Glory | Blood | Allurement | Unity | Emerald | Extreme Cold |
|---|---|---|---|---|---|---|---|---|
| Skill Damage | 100 | 150 | 350 | 350 | 450 | 500 | 700 | 1,000 |
| Two-Hand/Mastery DMG | 20 | 0 | 2 | 4 | 7 | 10 | 13 | 16 |
| Exc/Mastery Exc DMG | 35 | 1 | 3 | 5 | 8 | 11 | 14 | 17 |
| Crit/Mastery Crit DMG | 35 | 1 | 3 | 5 | 8 | 11 | 14 | 17 |
| Max Life | 2,500 | 5,000 | 10,000 | 15,000 | 20,000 | 25,000 | 35,000 | 50,000 |
Right Earring Options (1 of 5 randomly assigned)
| Option | Wrath | Forefathers | Glory | Blood | Allurement | Unity | Emerald | Extreme Cold |
|---|---|---|---|---|---|---|---|---|
| Max Phys Damage | 7 | 7 | 7 | 7 | 7 | 7 | 7 | 7 |
| Exc Damage Chance | 4% | 5% | 6% | 7% | 8% | 9% | 10% | 11% |
| Crit Damage Chance | 4% | 5% | 6% | 7% | 8% | 9% | 10% | 11% |
| AG Recovery Rate | 10 | 10 | 10 | 10 | 10 | 10 | 10 | 10 |
| Max Mana | 2,500 | 5,000 | 10,000 | 15,000 | 20,000 | 25,000 | 35,000 | 50,000 |
Muun Pets
Overview
Muuns are companion pets that provide passive stat bonuses to your character. They come in different grades and can be evolved for stronger effects.
Muun Grades
| Grade | Color | Level |
|---|---|---|
| Standard | White | 1 |
| Premium | Blue | 2 |
| Tempest | Light Green | 3 |
| Hero | Yellow | 4-5 + MAX |
Evolution Multipliers
| Evolution Level | Stat Multiplier |
|---|---|
| Level 1 | x5 |
| Level 2 | x7 |
| Level 3 | x9 |
| Level 4 | x11 |
| Level 5 | x13 |
| Evolved (MAX) | x20 |
Bonuses
- Skillpower increase
- Attack/Wizardry/Curse increase
- Stats scale with character level and muun evolution
- Obtained from Muun Eggs and Muun Boxes
Guardian System
Overview
Guardians are mount-type companions that provide movement speed, attack speed, defense, and special options. They are enhanced through the Trainer NPC in Lorencia and progress through 8 tiers.
Guardian Enhancement
- Combine at Trainer NPC in Lorencia (122, 110)
- Requires the previous tier Guardian at +11 minimum
- Higher enhancement level = higher success rate
Enhancement Success Rates
| Source Level | Success Rate |
|---|---|
| +15 | 100% |
| +14 | 90% |
| +13 | 80% |
| +12 | 70% |
| +11 | 60% |
Materials (6th Guardian Example)
- Guardian Seal - 50,000 Ruud from Priest James NPC
- Jewel of Bless x20
- Jewel of Soul x20
- Jewel of Chaos x1
- Jewel of Creation x1
Guardian Stats
- Movement speed increase
- Attack Speed +35
- Defense bonus
- 1-3 random options (elemental ATK/DEF, defense scaling)
- Elite Monster Resistance option
On failure: materials are lost and guardian reverts to +0.
Guardian Mount Stats (Eden Exclusive)
Each guardian tier provides passive bonuses while summoned. DMG% applies to both physical and magic damage. Absorb% reduces all incoming damage (PvE + PvP). Tiers 2+ have Normal and Rare variants.
| Tier | Guardian | Type | DMG% | Absorb% | Max HP |
|---|---|---|---|---|---|
| 1 | Phantasmal Steed | Normal | +5% | +3% | +20,000 |
| 2 | Ice Dragon | Normal | +10% | +6% | +50,000 |
| 2 | Ice Dragon | Rare | +18% | +11% | +105,000 |
| 3 | Fierce Lion | Normal | +15% | +9% | +80,000 |
| 3 | Fierce Lion | Rare | +26% | +16% | +160,000 |
| 4 | Shining Tail | Normal | +22% | +13% | +130,000 |
| 4 | Shining Tail | Rare | +35% | +22% | +235,000 |
| 5 | Ullr | Normal | +30% | +18% | +190,000 |
| 5 | Ullr | Rare | +45% | +28% | +315,000 |
| 6 | Leviathan | Normal | +40% | +25% | +280,000 |
| 6 | Leviathan | Rare | +55% | +33% | +400,000 |
| 7 | Taurus | Normal | +50% | +30% | +350,000 |
| 7 | Taurus | Rare | +65% | +40% | +500,000 |
| 8 | Rhino | Normal | +60% | +36% | +450,000 |
| 8 | Rhino | Rare | +75% | +46% | +600,000 |
Last Man Standing
Overview
Last Man Standing is an intense PvP battle royale where players fight until only one survivor remains. The last player standing claims massive rewards!
How to Participate
- Wait for an admin to start registration with /lms start
- Type /lms join to register (costs 10,000,000 Zen entry fee)
- Wait for the countdown (10 seconds)
- Fight to be the last survivor!
Commands
- /lms join - Join the event during registration
- /lms status - Check current event status
Rewards
1st Place (Winner)
- 500,000,000 Zen
- 50,000 Ruud
- 100 WCoins
2nd Place
- Recorded in leaderboard
- 250,000,000 Zen
- 25,000 Ruud
- 50 WCoins
3rd Place
- Recorded in leaderboard
- 100,000,000 Zen
- 10,000 Ruud
- 25 WCoins
Participation Reward
- 10,000,000 Zen (entry fee refunded + bonus)
Rules
- Maximum 30-minute duration
- PvP enabled in the arena
- Eliminated players are teleported back to town
- All kills and stats are recorded in the leaderboard
Leaderboard Stats
- Total Wins
- Total Games Played
- Total Kills & Deaths
- Best Placement
- Top 3 Finishes
- Win Streak
The Crucible (Ranked Arena)
Overview
The Crucible is a 1v1 ranked PvP system with a full ELO rating, seasonal leaderboard, and Ruud rewards. Players queue up, get matched against someone near their skill level, fight in an isolated arena, and earn or lose rating based on the result.
Queueing & Matchmaking
Press Join in the Queue tab to enter the queue. The server runs matchmaking every 5 seconds, looking for two queued players within an ELO range of each other.
- Search range starts at ±200 ELO
- Expands by +50 every 30 seconds you’ve been waiting
- Maximum range: ±500 ELO
Once matched, both players get a 5-second countdown then are teleported to a dedicated arena map (Map 74). Matches have a 3-minute time limit - if neither player dies, the match is cancelled with no ELO change.
ELO System
- Starting ELO: 1,000
- ELO floor: 0 (can’t go below 0)
- K-factor: 32 (maximum gain/loss per match is 32 points)
- Win reward: +500 Ruud paid instantly on victory
ELO is calculated using the standard formula - beating a much higher-rated player gains more points, beating a much lower-rated player gains fewer. Losing to a lower-rated player loses more.
Rank Tiers
| Tier | ELO Required |
|---|---|
| Bronze | 0-1099 |
| Silver | 1100-1299 |
| Gold | 1300-1499 |
| Platinum | 1500-1699 |
| Diamond | 1700+ |
Seasons
Each season lasts 14 days. When a season ends:
- Rewards are distributed automatically based on your final ELO and rank
- A server-wide announcement goes out
- Stats soft-reset: your ELO moves halfway back to 1000 (new_elo = 1000 + (elo - 1000) / 2), wins and losses reset to 0
- When you next log in, pending rewards are claimed automatically and paid in Ruud
You must have played at least 10 matches in the season to qualify for rewards.
Season End Rewards - Tier
| Tier | ELO | Ruud Reward |
|---|---|---|
| Diamond | 1700+ | 500,000 |
| Platinum | 1500-1699 | 250,000 |
| Gold | 1300-1499 | 100,000 |
| Silver | 1100-1299 | 50,000 |
| Bronze | 0-1099 | 10,000 |
Top Finish Bonus
Stacks on top of tier reward:
| Finish | Ruud Bonus |
|---|---|
| #1 | +2,000,000 |
| #2-3 | +1,000,000 |
| #4-10 | +500,000 |
Example: #1 Diamond Player
- Tier reward: 500,000 Ruud
- Top finish bonus: +2,000,000 Ruud
- Total: 2,500,000 Ruud
Tips
- The 30-second expand mechanic means if you queue at an unusual ELO you’ll eventually get matched - just takes longer.
- Win streak doesn’t matter - only your ELO determines matchmaking.
- 500 Ruud per win adds up quickly. 100 wins = 50,000 Ruud just from match rewards.
- The soft reset means very high-ELO players don’t start next season too far ahead - a 1700 player resets to 1350 (Gold), not back to 1000.
- If you want leaderboard rewards, focus on ELO over win rate - it’s the only thing that matters for tier placement.
PvP Bounty System
Overview
The Bounty System is an open-world PvP contract system. Any player can place a price on another player’s head using Zen, Ruud, or WCoin. When that target gets killed in PvP, the killer collects the reward automatically.
Requirements to Place a Bounty
- Minimum level 400
- Maximum 10 active bounties per player at a time
- Can’t place a bounty on yourself
- Can’t place duplicate bounties on the same target
- 3-second cooldown between placements
Minimum Bounty Amounts
| Currency | Minimum | Maximum |
|---|---|---|
| Zen | 10,000,000 | 2,000,000,000 |
| Ruud | 100 | 2,000,000,000 |
| WCoin | 10 | 1,000,000 |
Placing a Bounty
Use /bounty or F6 to open the panel, go to the Set Target tab, type the player name and select the amount and currency. The currency is deducted immediately when the bounty is placed.
Collecting a Bounty
Kill the bounty target in normal PvP anywhere in the world. The reward is paid out automatically the moment the kill is registered - no action needed. The bounty is marked “Completed” and removed from the active list.
Stacking
All bounties on a target stack independently - if three different players placed bounties on the same target, the killer collects all three at once.
Cancelling a Bounty
You can cancel your own active bounties from the “My Bounties” tab. You receive a 90% refund - 10% is lost as a penalty. This applies to all currencies (Zen, Ruud, WCoin).
Bounty Board
The main list in the panel shows all active bounties sorted by reward value (highest Zen first, then Ruud). Page size is 10 entries. The board is live and visible to all players - useful for target scouting.
Tips
- Bounties have no expiry - they stay active until the target is killed or the placer cancels.
- Multiple people can place bounties on the same target independently - they all pay out to the same killer.
- The 10% cancel fee discourages spam placing and pulling. Only commit if you mean it.
- Stacking Zen + Ruud + WCoin bounties from multiple accounts creates a very attractive payout for hunters.
- Check the board before hunting - it tells you who has the biggest price on their head server-wide.
- Min level 400 means this is a late-game system. Early players can be targets but can’t place bounties.
Reset System
Overview
Resetting is the core long-term progression system in Eden MU. Once you reach level 400, you can reset your character back to level 1 in exchange for permanent stat gains. Reaching 100 resets fully maximizes your character's stats regardless of class.
Requirements
| Requirement | Value |
|---|---|
| Character Level | 400 |
| Zen Cost | 100,000,000 |
| How to Reset | In-game /reset command |
Goal: 100 Resets
Max Stats at 100 Resets
At 100 resets, your character reaches fully maxed stats. This applies to all classes equally - there is no class-specific reset cap or bonus.
How It Works
- Level your character to 400 and have 100,000,000 Zen on hand.
- Type /reset in-game to reset.
- Your character returns to level 1. Your reset count increases by 1.
- Level up again and repeat - each reset permanently grows your character's potential.
- At 100 resets your stats are fully maximized.
Stat Points
Stat points are earned through leveling (3 points per level, 4 for Dark Lord) and distributed manually by the player. You choose how to allocate them across Strength, Agility, Vitality, and Energy (and Command for Dark Lord).
Each reset grants the following bonus rewards:
- 120 bonus stat points per reset (50 for Dark Lord)
- 5,000 Ruud per reset
- 20 WCoin per reset
- 5,000 Goblin Points per reset
Reset Buff System
Reaching specific reset counts unlocks permanent combat buffs. Higher tiers replace lower ones. These bonuses are always active.
| Tier | Resets | Phys DMG | Magic DMG | Defense | HP | SD | MP | AG | Skill DMG | DMG Red |
|---|---|---|---|---|---|---|---|---|---|---|
| 1 | 10+ | +50 | +50 | +30 | +500 | +300 | - | - | - | - |
| 2 | 25+ | +150 | +150 | +100 | +1,500 | +1,000 | +500 | - | - | - |
| 3 | 50+ | +300 | +300 | +250 | +3,500 | +2,500 | +1,000 | +500 | +50 | - |
| 4 | 75+ | +500 | +500 | +500 | +6,000 | +5,000 | +2,000 | +1,000 | +100 | +50 |
| 5 | 100 | +800 | +800 | +800 | +10,000 | +8,000 | +3,000 | +1,500 | +200 | +100 |
Additional bonuses at higher tiers:
| Tier | Resets | Phys % | Magic % | DMG Increase | DMG Decrease | HP Recovery | SD Recovery | EXP Bonus |
|---|---|---|---|---|---|---|---|---|
| 1 | 10+ | - | - | - | - | - | - | +10% |
| 2 | 25+ | - | - | +5% | +3% | - | - | - |
| 3 | 50+ | - | - | +8% | +5% | - | - | - |
| 4 | 75+ | +5% | +5% | +12% | +8% | - | - | - |
| 5 | 100 | +10% | +10% | +15% | +10% | +50 | +30 | - |
Reset Milestones
At specific reset counts, you receive one-time milestone rewards (stat points, Ruud, WCoin, Goblin Points, or Gremory Case items). Rewards are claimed automatically when you reach the milestone reset count. Use the in-game command to check your progress:
- /milestones - View your pending and upcoming milestone rewards
Jewel Warehouse
Overview
The Jewel Warehouse is a secure, account-wide storage system for your valuable jewels and stones. Access your stored items from any character on your account!
Supported Items
Jewels
- Jewel of Bless
- Jewel of Soul
- Jewel of Chaos
- Jewel of Life
- Jewel of Creation
- Gemstone
- Jewel of Harmony
Custom Jewels
- Jewel of Dark Life
- Jewel of Level
- Jewel of Skill
- Jewel of Luck
- Jewel of Weapon Excellent
- Jewel of Armor Excellent
- Jewel of Socket
- Legendary Weapon Excellent
- Legendary Armor Excellent
- Jewel of Guardian
Stones & Upgrade Materials
- Guardian Upgrade Stone
- Elite Guardian Upgrade Stone
- Ultimate Magic Stone
- Lower Magic Stone
- Medium Magic Stone
- Higher Magic Stone
- Lower Refining Stone
- Higher Refining Stone
- Mysterious Stone
- Lapidary Stone
Enhancement Items
- Sphere Upgrade Rune
- Temple Guardian Enhancement
- Shining Temple Guardian Enhancement
- Imperial Reinforcement Stone
- Shining Imperial Reinforcement Stone
- Ability Crystal
- Artifact Upgrade Stone
- Wing Core Upgrade Stone
Misc
- Runic Essence
- Elemental Rune
- Spider Artifact Fragment
- Talisman of Luck
- Elemental Talisman of Luck
- Golden Crest
- Fragment of Resurrection
- Uriels Feather
How to Use
- Press F10 to open the Jewel Warehouse
- Deposit: Select jewels from your inventory to store
- Withdraw: Select stored jewels to retrieve to your inventory
- Stash All: Deposit all supported items from your inventory at once
- Query: View your current balance of all stored items
Features
- Account-Wide - Access from any character
- Unlimited Storage - No capacity limits per jewel type
- Instant Access - Deposit and withdraw instantly
- Secure - Protected against loss or theft
- Cooldown - 300ms between operations (anti-spam)
Safety Features
- Balance verification after each transaction
- Audit log of all deposits / withdrawals
- Automatic rollback on failed transactions
- Real-time balance updates
Limits
- Maximum 1,000 items per deposit / withdrawal operation
Guild Warehouse
Overview
The Guild Warehouse is a shared vault for the whole guild. Any member can deposit and any member can withdraw, and every deposit and withdrawal is recorded in a log the whole guild can read.
Open it with the F8 key or from the in-game menu. You must be in a guild to open it, and leaving the guild ends your access immediately. Balances update live for guild members who are online.
What It Holds
Jewels
- Jewel of Bless
- Jewel of Soul
- Jewel of Chaos
- Jewel of Life
- Jewel of Creation
- Jewel of Harmony
- Jewel of Guardian
- Jewel of Dark Life
- Jewel of Level
- Jewel of Skill
- Jewel of Luck
- Jewel of Weapon Excellent
- Jewel of Armor Excellent
- Jewel of Socket
- Legendary Weapon Excellent
- Legendary Armor Excellent
Stones
- Lower Magic Stone
- Medium Magic Stone
- Higher Magic Stone
- Ultimate Magic Stone
- Guardian Upgrade Stone
- Elite Guardian Upgrade Stone
- Temple Guardian Enhancement
- Shining Temple Guardian Enhancement
- Imperial Reinforcement Stone
- Shining Imperial Reinforcement Stone
- Lower Refining Stone
- Higher Refining Stone
- Mysterious Stone
- Artifact Upgrade Stone
- Lapidary Stone
- Wing Core Upgrade Stone
Misc
- Gemstone
- Spider Artifact Fragment
- Sphere Upgrade Rune
- Elemental Rune
- Ability Crystal
- Talisman of Luck
- Elemental Talisman of Luck
- Golden Crest
- Fragment of Resurrection
- Uriels Feather
- Runic Essence
Currency
- Zen, capped at 2,000,000,000
- Ruud, capped at 2,000,000,000
The Guild Warehouse does not store equipment, wings, pets or WCoin. For private, account-wide jewel storage use the Jewel Warehouse instead.
Using It
The window has five tabs: Jewels, Stones, Misc, Currency and Log.
- On the jewel tabs, click an icon to open a small panel with deposit and withdraw buttons for 1, 10, 100 and All.
- On the Currency tab, Zen and Ruud each have their own deposit and withdraw rows. All deposits everything you carry, or withdraws everything the vault holds, whichever is smaller.
- Withdrawals are limited by your free inventory space. Anything that does not fit stays in the warehouse.
The Log
The Log tab lists the most recent 50 actions, newest first. Deposits are shown in green and withdrawals in red, and every line names who did it and what moved. Drag the scrollbar on the right to read further back.
Guild Warehouse vs Jewel Warehouse
| Feature | Guild Warehouse | Jewel Warehouse |
|---|---|---|
| Who can access it | The whole guild | Your account only |
| What it stores | Jewels, stones and currency | Jewels and stones |
| Actions are logged | Yes | No |
| How it opens | F8 | F10 |
A Note on Trust
Any member can withdraw everything the vault holds, so a guild should only invite players it trusts.
Moss Merchant
Overview
Moss trades sealed boxes for Zen, Coin of Miracle and jewels. Each box is a gamble: you pay the listed price and receive one random item from that box's pool. He is only open during his four daily windows, so plan your visit.
The lists below are the complete contents of each box, with the chance of each reward. Percentages are that box's roll weights normalised to 100%, read straight from the server's own table, so they are exact relative to each other within a box.
Opening Times
Moss opens four times a day, at 02:00, 08:00, 14:00 and 20:00 server time. He remains available for a limited period after each opening.
Boxes
Weapon Box
Mid-tier weapons and shields, every one +11 with an Excellent option. Bloodangel and Darkangel pieces appear rarely and are the entry to the Anvil upgrade chain.
Cost: 20,000,000 Zen
| Tier | Pieces | Combined chance | Each |
|---|---|---|---|
| Mastery weapons and shields | 64 | 98.54% | 1.540% |
| Bloodangel | 27 | 0.98% | 0.036% |
| Darkangel | 27 | 0.49% | 0.018% |
Every piece rolls +11 with one Excellent option.
The 27 Darkangel pieces are the rarest thing in the box: at 0.018% each, a specific one is roughly 1 roll in 5,500.
Rare: Bloodangel and Darkangel weapons and shields, every type
Common: Absolute Scepter, Almandine Orb, Amber Elixir, Amber Wand, Ambition Shield, Angelic Bow, Asura, Baiwen Magic Gun, Belief Hammer, Belief Shield, Blast Break, Blast Hammer, Blast Shield, Blood Blade, Bone Blade, Cannon Magic Gun, Constant Shield, Crimson Glory, Cyclone Sword, Dark Devil Shield, Dark Stinger, Deadly Staff, Devast Claw, Devil Crossbow, Devilwood Quiver, Dragon Blade, Eternal Wing Stick, Explosion Blade, Flameberge, Frost Barrier, Frost Mace, Frost Rune Mace, Grace Shield, Grand Viper Staff, Guardian Shield, Horn of Steal, Inberial Staff, Lazy Wind Shield, Legendary Magic Book, Light Lord Rune Mace, Light Lord Shield, Magic Knight Shield, Magmu Spear, Miracle Staff, Morganite Elixir, Morganite Wand, Novacula Short Sword, Pairing Short Sword, Pantera Claw, Phoenix Soul Star, Rectuus Lance, Rune Bastard Sword, Russell Light Lance, Salamander Shield, Soleil Scepter, Sonic Blade, Spinel Orb, Spite Staff, Storm Blitz Stick, Summon Spirit Stick, Sword Breaker, Sylph Wind Bow, Thunderbolt, Wise Magic Book
Runic Forge Box
Runic Forge supplies. Most rolls are an upgrade stone; the rest are sealed pouches that open for Runic Essence.
Cost: 15 x Coin of Miracle
| Reward | Chance |
|---|---|
| Artifact Upgrade Stone | 30.00% |
| Ultimate Magic Stone | 30.00% |
| Runic Pouch [Lesser] 10x | 20.00% |
| Runic Pouch [Standard] 25x | 12.00% |
| Runic Pouch [Greater] 50x | 6.00% |
| Runic Pouch [Grand] 100x | 2.00% |
Common: Ultimate Magic Stone, Artifact Upgrade Stone
Pouches: Runic Pouch [Lesser] (10 Runic Essence), Runic Pouch [Standard] (25 Runic Essence), Runic Pouch [Greater] (50 Runic Essence), Runic Pouch [Grand] (100 Runic Essence)
Miracle Coin Box
The cheapest box. Talismans, a Master EXP Potion and the occasional Conqueror's Badge.
Cost: 1 x Coin of Miracle
| Reward | Chance |
|---|---|
| Elemental Talisman of Chaos | 17.86% |
| Elemental Talisman of Luck | 17.86% |
| Master EXP Potion (4) | 17.86% |
| Talisman of Chaos Assembly | 17.86% |
| Talisman of Luck | 17.86% |
| Condor Feather | 8.93% |
| Conqueror's Badge | 1.79% |
Contents: Conqueror's Badge, Condor Feather, Elemental Talisman of Luck, Elemental Talisman of Chaos, Talisman of Luck, Talisman of Chaos Assembly, Master EXP Potion [4]
Mastery Accessory Box
Accessories and jewels, including the Wrath and Forefathers earrings.
Cost: 3 x Coin of Miracle
| Reward | Chance |
|---|---|
| Guardian Jewel | 12.50% |
| Jewel of Creation | 12.50% |
| Jewel of Harmony | 12.50% |
| Jewel of Life | 12.50% |
| Jewel of Soul | 12.50% |
| Jewel of Chaos | 9.38% |
| Earring of Forefathers [Left] | 4.69% |
| Earring of Forefathers [Right] | 4.69% |
| Earring of Wrath [Left] | 4.69% |
| Earring of Wrath [Right] | 4.69% |
| Necklace of Lightning | 4.69% |
| Ring of Fire | 4.69% |
Contents: Jewel of Chaos, Pendant of Lightning, Ring of Fire, Earring of Wrath [Left], Earring of Wrath [Right], Earring of Forefathers [Left], Earring of Forefathers [Right], Jewel of Soul, Jewel of Life, Jewel of Creation, Jewel of Guardian, Jewel of Harmony
Jewel of Bless Box
Talismans, Bless of Light and a Ruud Box.
Cost: 10 x Jewel of Bless
| Reward | Chance |
|---|---|
| Bless of Light (Lower) | 11.76% |
| Elemental Talisman of Chaos | 11.76% |
| Elemental Talisman of Luck | 11.76% |
| Master EXP Potion (6) | 11.76% |
| Pendant of Fire | 11.76% |
| Ruud Box (1000) | 11.76% |
| Talisman of Chaos Assembly | 11.76% |
| Talisman of Luck | 11.76% |
| Condor Flame | 3.53% |
| Condor Feather | 2.35% |
Contents: Elemental Talisman of Luck, Elemental Talisman of Chaos, Pendant of Fire, Condor Flame, Condor Feather, Talisman of Luck, Talisman of Chaos Assembly, Bless of Light [Low Grade], Master EXP Potion [6], Ruud Box [1,000]
Jewel of Soul Box
As the Bless box, with a Greater Bless of Light and a chance at the Dark Transformation Ring.
Cost: 10 x Jewel of Soul
| Reward | Chance |
|---|---|
| Bless of Light (Greater) | 11.11% |
| Elemental Talisman of Chaos | 11.11% |
| Elemental Talisman of Luck | 11.11% |
| Master EXP Potion (4) | 11.11% |
| Pendant of Fire | 11.11% |
| Ruud Box(1000) | 11.11% |
| Talisman of Chaos Assembly | 11.11% |
| Talisman of Luck | 11.11% |
| Dark Transformation Ring | 5.56% |
| Condor Flame | 3.33% |
| Condor Feather | 2.22% |
Contents: Condor Flame, Condor Feather, Pendant of Fire, Dark Transformation Ring, Elemental Talisman of Luck, Elemental Talisman of Chaos, Talisman of Luck, Talisman of Chaos Assembly, Bless of Light [Greater], Master EXP Potion [4], Ruud Box [1,000]
Guardian Box
Upgrade materials and seals. Jewels, Guardian Upgrade Stone, Fragment of Resurrection.
Cost: 5 x Coin of Miracle + 10 x Jewel of Bless
| Reward | Chance |
|---|---|
| Jewel of Chaos | 16.43% |
| Jewel of Creation | 16.43% |
| Jewel of Life | 16.43% |
| Jewel of Soul | 16.43% |
| [Bound] Bless of Light (Middle Grade) | 16.43% |
| Fragment of Resurrection | 6.16% |
| Guardian Upgrade Stone | 6.16% |
| Golden Crest | 3.08% |
| Seal of the Phantasmal Steed | 2.46% |
Contents: Jewel of Chaos, Seal of the Phantasmal Steed, Fragment of Resurrection, Guardian Upgrade Stone, [Bound] Bless of Light [Middle Grade], Jewel of Soul, Jewel of Life, Jewel of Creation, Golden Crest
Miraclous Moss
The top box. Garuda materials, Bloodangel Souls, Lapidary Stone and a Mastery Reward Chest.
Cost: 10 x Coin of Miracle + 10 x Jewel of Bless
| Reward | Chance |
|---|---|
| Talisman of Chaos Assembly | 21.74% |
| Golden Crest | 19.57% |
| Bless of Light (Greater) | 11.74% |
| Bloodangel Soul | 9.78% |
| Lapidary Stone | 9.78% |
| Master EXP Potion (4) | 9.78% |
| Mastery Reward Chest (10,000) | 4.89% |
| [Hero] Bloodangel Soul | 4.89% |
| Garuda's Feather | 3.91% |
| Garuda's Flame | 3.91% |
Contents: Garuda's Feather, Garuda's Flame, Talisman of Chaos Assembly, Bloodangel Soul, [Hero] Bloodangel Soul, Lapidary Stone, Golden Crest, Master EXP Potion [4], Mastery Reward Chest [10,000], Bless of Light [Greater]
Runic Pouches
The Runic Forge Box can give one of four sealed pouches. A pouch opens by itself once it is in your inventory and delivers its Runic Essence as a single stack, so you do not need to pick anything up.
Pouch tiers
Runic Pouch [Lesser]: 10 Runic Essence
Runic Pouch [Standard]: 25 Runic Essence
Runic Pouch [Greater]: 50 Runic Essence
Runic Pouch [Grand]: 100 Runic Essence
VIP Tiers & Bonuses
Overview
VIP is an account-wide subscription in three tiers. Buying one gives you a token; the token is consumed a second later and the time is added to your account, so there is nothing to activate by hand. Every character on the account shares the benefit.
Prices
| Tier | 7 days | 30 days |
|---|---|---|
| VIP Bronze | 2,400 WCoin | 8,000 WCoin |
| VIP Silver | 3,900 WCoin | 13,000 WCoin |
| VIP Premium | 6,000 WCoin | 20,000 WCoin |
Stacking
Buying while VIP is already running follows three rules:
- Same tier: the days are added to the time you have left. A token or purchase is only used once 21 days or fewer remain, so nothing is wasted while you are already stocked up.
- Higher tier: it starts at once and takes over, and the remaining time on the old tier is not kept.
- Lower tier: the token stays in your bag and is used automatically once your current VIP runs out. Nothing is lost.
Experience
| Bonus | No VIP | Bronze | Silver | Premium |
|---|---|---|---|---|
| Experience rate | base | +20% | +30% | +40% |
| Master experience rate | base | +20% | +30% | +40% |
| Event experience | base | +20% | +30% | +40% |
| Quest experience | base | +20% | +30% | +40% |
Drops and Zen
| Bonus | No VIP | Bronze | Silver | Premium |
|---|---|---|---|---|
| Item drop rate | 80 | 88 (+10%) | 96 (+20%) | 108 (+35%) |
| Zen dropped per kill | base | +10% | +20% | +30% |
Success rates
VIP improves the odds on the jewels and options that matter most.
| Roll | No VIP | Bronze | Silver | Premium |
|---|---|---|---|---|
| Jewel of Soul | 70 | 75 | 80 | 85 |
| Jewel of Life | 70 | 73 | 77 | 84 |
| Jewel of Harmony | 50 | 52 | 55 | 60 |
| Luck success rate 1 | 25 | 26 | 27 | 30 |
| Luck success rate 2 | 20 | 21 | 22 | 24 |
Quality of life
| Feature | No VIP | Bronze | Silver | Premium |
|---|---|---|---|---|
| MU Helper, max session | 1 hour | 4 hours | 12 hours | 24 hours |
| Offline attack, max session | 12 hours | 24 hours | 36 hours | 48 hours |
| Warehouses | 1 | 2 | 3 | 5 |
| /post cooldown | 10s | 8s | 6s | 3s |
| /post buy and sell cooldown | 30s | 20s | 15s | 10s |
| PK clear cost | 1,000,000,000 Zen | 800,000,000 Zen | 500,000,000 Zen | 250,000,000 Zen |
| Reset cost | - | 80,000,000 Zen | 50,000,000 Zen | 25,000,000 Zen |
Both the reset and /pkclear fees drop as the tier rises.
Box Odds
These are the exact contents and chances of every box whose tooltip points here. The percentages are generated straight from the server's own drop tables, not written by hand, so they match what the game rolls.
A box with one slot gives you one of the listed rewards. A box with several slots rolls each slot separately and gives you several rewards at once, so those tables add up to more than 100%.
Launch Event
Eden Anvil Box
Every open gives one of the following.
| Reward | Chance |
|---|---|
| Darkangel Anvil | 22.50% |
| Holyangel Anvil | 18.00% |
| Soul Anvil | 15.00% |
| Blue Eye Anvil | 13.00% |
| Silver Heart Anvil | 11.00% |
| Manticore Anvil | 9.00% |
| Brilliant Anvil | 6.00% |
| Apocalypse Anvil | 4.00% |
| Lightning Anvil | 1.00% |
| Temple Guard Anvil | 0.50% |
Jar of Arcanum
Every open gives one of the following.
| Reward | Chance |
|---|---|
| Elixir of Agility | 20.00% |
| Elixir of Control | 20.00% |
| Elixir of Energy | 20.00% |
| Elixir of Health | 20.00% |
| Elixir of Strength | 20.00% |
Elemental Capsules
Seed Capsules
Seed Capsule [Fire]
Every open gives one of the following.
| Reward | Chance |
|---|---|
| Seed Sphere [Fire][Lvl. 3] | 60.00% |
| Seed Sphere [Fire][Lvl. 4] | 30.00% |
| Seed Sphere [Fire][Lvl. 5] | 10.00% |
Seed Capsule [Water]
Every open gives one of the following.
| Reward | Chance |
|---|---|
| Seed Sphere [Water][Lvl. 3] | 60.00% |
| Seed Sphere [Water][Lvl. 4] | 30.00% |
| Seed Sphere [Water][Lvl. 5] | 10.00% |
Seed Capsule [Ice]
Every open gives one of the following.
| Reward | Chance |
|---|---|
| Seed Sphere [Ice][Lvl. 3] | 60.00% |
| Seed Sphere [Ice][Lvl. 4] | 30.00% |
| Seed Sphere [Ice][Lvl. 5] | 10.00% |
Seed Capsule [Wind]
Every open gives one of the following.
| Reward | Chance |
|---|---|
| Seed Sphere [Wind][Lvl. 3] | 60.00% |
| Seed Sphere [Wind][Lvl. 4] | 30.00% |
| Seed Sphere [Wind][Lvl. 5] | 10.00% |
Seed Capsule [Lightning]
Every open gives one of the following.
| Reward | Chance |
|---|---|
| Seed Sphere [Lightning][Lvl. 3] | 60.00% |
| Seed Sphere [Lightning][Lvl. 4] | 30.00% |
| Seed Sphere [Lightning][Lvl. 5] | 10.00% |
Seed Capsule [Earth]
Every open gives one of the following.
| Reward | Chance |
|---|---|
| Seed Sphere [Earth][Lvl. 3] | 60.00% |
| Seed Sphere [Earth][Lvl. 4] | 30.00% |
| Seed Sphere [Earth][Lvl. 5] | 10.00% |
Errtel Capsules
Shining Errtel Capsule [Fire]
Every open gives one of the following.
| Reward | Chance |
|---|---|
| Errtel of Anger [I] | 25.00% |
| Errtel of Blessing [I] | 25.00% |
| Errtel of Divinity [I] | 25.00% |
| Errtel of Integrity [I] | 25.00% |
Shining Errtel Capsule [Water]
Every open gives one of the following.
| Reward | Chance |
|---|---|
| Errtel of Anger [I] | 25.00% |
| Errtel of Blessing [I] | 25.00% |
| Errtel of Divinity [I] | 25.00% |
| Errtel of Integrity [I] | 25.00% |
Shining Errtel Capsule [Earth]
Every open gives one of the following.
| Reward | Chance |
|---|---|
| Errtel of Anger [I] | 25.00% |
| Errtel of Blessing [I] | 25.00% |
| Errtel of Divinity [I] | 25.00% |
| Errtel of Integrity [I] | 25.00% |
Shining Errtel Capsule [Wind]
Every open gives one of the following.
| Reward | Chance |
|---|---|
| Errtel of Anger [I] | 25.00% |
| Errtel of Blessing [I] | 25.00% |
| Errtel of Divinity [I] | 25.00% |
| Errtel of Integrity [I] | 25.00% |
Shining Errtel Capsule [Darkness]
Every open gives one of the following.
| Reward | Chance |
|---|---|
| Errtel of Anger [I] | 25.00% |
| Errtel of Blessing [I] | 25.00% |
| Errtel of Divinity [I] | 25.00% |
| Errtel of Integrity [I] | 25.00% |
Lucky Tickets
2nd Lucky Helm Ticket
Every open rolls 15 separate slots, so you receive several of these at once. Each percentage is that item's own chance.
| Reward | Chance |
|---|---|
| Darkangel Alchemist Helm | 100.00% |
| Darkangel Crusader Helm | 100.00% |
| Darkangel Fighter Helm | 100.00% |
| Darkangel Gun Crusher Helm | 100.00% |
| Darkangel Illusion Knight Helm | 100.00% |
| Darkangel Lancer Helm | 100.00% |
| Darkangel Lord Helm | 100.00% |
| Darkangel Mage Helm | 100.00% |
| Darkangel Rune Mage Helm | 100.00% |
| Darkangel Slayer Helm | 100.00% |
| Darkangel Summoner Helm | 100.00% |
| Darkangel White Wizard Helm | 100.00% |
| Darkangel Wizard Helm | 100.00% |
| Darkangel Elf Helm [A] | 50.00% |
| Darkangel Elf Helm [E] | 50.00% |
| Darkangel Knight Helm [E] | 50.00% |
| Darkangel Knight Helm [S] | 50.00% |
2nd Lucky Armor Ticket
Every open rolls 16 separate slots, so you receive several of these at once. Each percentage is that item's own chance.
| Reward | Chance |
|---|---|
| Darkangel Alchemist Armor | 100.00% |
| Darkangel Crusader Armor | 100.00% |
| Darkangel Fighter Armor | 100.00% |
| Darkangel Gun Crusher Armor | 100.00% |
| Darkangel Illusion Knight Armor | 100.00% |
| Darkangel Lancer Armor | 100.00% |
| Darkangel Lord Armor | 100.00% |
| Darkangel Mage Armor | 100.00% |
| Darkangel Rune Mage Armor | 100.00% |
| Darkangel Slayer Armor | 100.00% |
| Darkangel Summoner Armor | 100.00% |
| Darkangel White Wizard Armor | 100.00% |
| Darkangel Wizard Armor | 100.00% |
| Darkangel Elf Armor [A] | 50.00% |
| Darkangel Elf Armor [E] | 50.00% |
| Darkangel Knight Armor [E] | 50.00% |
| Darkangel Knight Armor [S] | 50.00% |
| Darkangel Magic Armor [E] | 50.00% |
| Darkangel Magic Armor [S] | 50.00% |
2nd Lucky Pants Ticket
Every open rolls 16 separate slots, so you receive several of these at once. Each percentage is that item's own chance.
| Reward | Chance |
|---|---|
| Darkangel Alchemist Pants | 100.00% |
| Darkangel Crusader Pants | 100.00% |
| Darkangel Fighter Pants | 100.00% |
| Darkangel Gun Crusher Pants | 100.00% |
| Darkangel Illusion Knight Pants | 100.00% |
| Darkangel Lancer Pants | 100.00% |
| Darkangel Lord Pants | 100.00% |
| Darkangel Mage Pants | 100.00% |
| Darkangel Rune Mage Pants | 100.00% |
| Darkangel Slayer Pants | 100.00% |
| Darkangel Summoner Pants | 100.00% |
| Darkangel White Wizard Pants | 100.00% |
| Darkangel Wizard Pants | 100.00% |
| Darkangel Elf Pants [A] | 50.00% |
| Darkangel Elf Pants [E] | 50.00% |
| Darkangel Knight Pants [E] | 50.00% |
| Darkangel Knight Pants [S] | 50.00% |
| Darkangel Magic Pants [E] | 50.00% |
| Darkangel Magic Pants [S] | 50.00% |
2nd Lucky Gloves Ticket
Every open rolls 15 separate slots, so you receive several of these at once. Each percentage is that item's own chance.
| Reward | Chance |
|---|---|
| Darkangel Alchemist Gloves | 100.00% |
| Darkangel Crusader Gloves | 100.00% |
| Darkangel Gun Crusher Gloves | 100.00% |
| Darkangel Illusion Knight Gloves | 100.00% |
| Darkangel Lancer Gloves | 100.00% |
| Darkangel Lord Gloves | 100.00% |
| Darkangel Mage Gloves | 100.00% |
| Darkangel Rune Mage Gloves | 100.00% |
| Darkangel Slayer Gloves | 100.00% |
| Darkangel Summoner Gloves | 100.00% |
| Darkangel White Wizard Gloves | 100.00% |
| Darkangel Wizard Gloves | 100.00% |
| Darkangel Elf Gloves [A] | 50.00% |
| Darkangel Elf Gloves [E] | 50.00% |
| Darkangel Knight Gloves [E] | 50.00% |
| Darkangel Knight Gloves [S] | 50.00% |
| Darkangel Magic Gloves [E] | 50.00% |
| Darkangel Magic Gloves [S] | 50.00% |
2nd Lucky Boots Ticket
Every open rolls 16 separate slots, so you receive several of these at once. Each percentage is that item's own chance.
| Reward | Chance |
|---|---|
| Darkangel Alchemist Boots | 100.00% |
| Darkangel Crusader Boots | 100.00% |
| Darkangel Fighter Boots | 100.00% |
| Darkangel Gun Crusher Boots | 100.00% |
| Darkangel Illusion Knight Boots | 100.00% |
| Darkangel Lancer Boots | 100.00% |
| Darkangel Lord Boots | 100.00% |
| Darkangel Mage Boots | 100.00% |
| Darkangel Rune Mage Boots | 100.00% |
| Darkangel Slayer Boots | 100.00% |
| Darkangel Summoner Boots | 100.00% |
| Darkangel White Wizard Boots | 100.00% |
| Darkangel Wizard Boots | 100.00% |
| Darkangel Elf Boots [A] | 50.00% |
| Darkangel Elf Boots [E] | 50.00% |
| Darkangel Knight Boots [E] | 50.00% |
| Darkangel Knight Boots [S] | 50.00% |
| Darkangel Magic Boots [E] | 50.00% |
| Darkangel Magic Boots [S] | 50.00% |
Speed Gear Boxes
Artifacts
Spider Artifact Box
Every open gives one of the following.
| Reward | Chance |
|---|---|
| Spider Artifact Type 1 x5 | 20.00% |
| Spider Artifact Type 2 x5 | 20.00% |
| Spider Artifact Type 3 x5 | 20.00% |
| Spider Artifact Type 4 x5 | 20.00% |
| Spider Artifact Type 5 x5 | 20.00% |
Spider Artifact Type 6,7 Box
Every open gives one of the following.
| Reward | Chance |
|---|---|
| Spider Artifact Type 6 x5 | 50.00% |
| Spider Artifact Type 7 x5 | 50.00% |
Currency Boxes
Pets and Muun
Tempest Muun Egg [Intensification]
Every open gives one of the following.
| Reward | Chance |
|---|---|
| Bael | 16.67% |
| Bael [Evolved] | 16.67% |
| Lion Mask | 16.67% |
| Lion Mask [Evolved] | 16.67% |
| Snowflake Fairy | 16.67% |
| Snowflake Fairy [Evolved] | 16.67% |
Tempest Muun Egg [Frenzy]
Every open gives one of the following.
| Reward | Chance |
|---|---|
| Bael | 16.67% |
| Bael [Evolved] | 16.67% |
| Lion Mask | 16.67% |
| Lion Mask [Evolved] | 16.67% |
| Snowflake Fairy | 16.67% |
| Snowflake Fairy [Evolved] | 16.67% |
Cards
Red Card [Elemental]
Every open rolls 3 separate slots, so you receive several of these at once. Each percentage is that item's own chance.
| Reward | Chance |
|---|---|
| Errtel of Anger x1 | 9.09% |
| Errtel of Blessing x1 | 9.09% |
| Errtel of Divinity x1 | 9.09% |
| Errtel of Integrity x1 | 9.09% |
| Errtel of Radiance x1 | 9.09% |
| Seed Sphere [Earth][Lvl. 5] | 9.09% |
| Seed Sphere [Fire][Lvl. 5] | 9.09% |
| Seed Sphere [Ice][Lvl. 5] | 9.09% |
| Seed Sphere [Lightning][Lvl. 5] | 9.09% |
| Seed Sphere [Water][Lvl. 5] | 9.09% |
| Seed Sphere [Wind][Lvl. 5] | 9.09% |
| Ancient Icarus Scroll | 6.67% |
| Antonia's Sword | 6.67% |
| Arca's Prophecy | 6.67% |
| Empire Guardians' Stronghold | 6.67% |
| Gladiator's Dagger | 6.67% |
| Iron Shield of the Magic | 6.67% |
| Kundun's Madness Blade | 6.67% |
| Kundun's Magic Spell Scroll | 6.67% |
| Kundun's Seal Scroll | 6.67% |
| Lemuria's Orb | 6.67% |
| Lorencia Knights' Iron Shield | 6.67% |
| Merciless Gladiator's Dagger | 6.67% |
| Norrwen's Bloodstring Lyra | 6.67% |
| Runedil's Goldentune Harp | 6.67% |
| Thoughtful Sage's Jewel | 6.67% |
| Bloodangel Elf Armor [A] | 1.89% |
| Bloodangel Elf Boots [A] | 1.89% |
| Bloodangel Elf Gloves [A] | 1.89% |
| Bloodangel Elf Helm [A] | 1.89% |
| Bloodangel Elf Pants [A] | 1.89% |
| Bloodangel Fighter Armor | 1.89% |
| Bloodangel Fighter Boots | 1.89% |
| Bloodangel Fighter Helm | 1.89% |
| Bloodangel Fighter Pants | 1.89% |
| Bloodangel Gun Crusher Armor | 1.89% |
| Bloodangel Gun Crusher Boots | 1.89% |
| Bloodangel Gun Crusher Gloves | 1.89% |
| Bloodangel Gun Crusher Helm | 1.89% |
| Bloodangel Gun Crusher Pants | 1.89% |
| Bloodangel Knight Armor [S] | 1.89% |
| Bloodangel Knight Boots [S] | 1.89% |
| Bloodangel Knight Gloves [S] | 1.89% |
| Bloodangel Knight Helm [S] | 1.89% |
| Bloodangel Knight Pants [S] | 1.89% |
| Bloodangel Lancer Armor | 1.89% |
| Bloodangel Lancer Boots | 1.89% |
| Bloodangel Lancer Gloves | 1.89% |
| Bloodangel Lancer Helm | 1.89% |
| Bloodangel Lancer Pants | 1.89% |
| Bloodangel Lord Armor | 1.89% |
| Bloodangel Lord Boots | 1.89% |
| Bloodangel Lord Gloves | 1.89% |
| Bloodangel Lord Helm | 1.89% |
| Bloodangel Lord Pants | 1.89% |
| Bloodangel Magic Armor [S] | 1.89% |
| Bloodangel Magic Boots [S] | 1.89% |
| Bloodangel Magic Gloves [S] | 1.89% |
| Bloodangel Magic Pants [S] | 1.89% |
| Bloodangel Rune Mage Armor | 1.89% |
| Bloodangel Rune Mage Boots | 1.89% |
| Bloodangel Rune Mage Gloves | 1.89% |
| Bloodangel Rune Mage Helm | 1.89% |
| Bloodangel Rune Mage Pants | 1.89% |
| Bloodangel Slayer Armor | 1.89% |
| Bloodangel Slayer Boots | 1.89% |
| Bloodangel Slayer Gloves | 1.89% |
| Bloodangel Slayer Helm | 1.89% |
| Bloodangel Slayer Pants | 1.89% |
| Bloodangel Summoner Armor | 1.89% |
| Bloodangel Summoner Boots | 1.89% |
| Bloodangel Summoner Gloves | 1.89% |
| Bloodangel Summoner Helm | 1.89% |
| Bloodangel Summoner Pants | 1.89% |
| Bloodangel Wizard Armor | 1.89% |
| Bloodangel Wizard Boots | 1.89% |
| Bloodangel Wizard Gloves | 1.89% |
| Bloodangel Wizard Helm | 1.89% |
| Bloodangel Wizard Pants | 1.89% |
Other Boxes
Golden Box
Opened from a Sealed Golden Box with a Gold Key. Every open gives three rewards, one from each roll below, plus 5,000 to 10,000 Ruud. Percentages are the chance inside that roll.
| Roll | Reward | Chance |
|---|---|---|
| Jewel stack | Gemstone x3 | 16.67% |
| Jewel stack | Jewel of Bless x10 | 16.67% |
| Jewel stack | Jewel of Chaos x10 | 16.67% |
| Jewel stack | Jewel of Creation x5 | 16.67% |
| Jewel stack | Jewel of Life x5 | 16.67% |
| Jewel stack | Jewel of Soul x10 | 16.67% |
| Errtel | Errtel of Anger rank 2 | 10.00% |
| Errtel | Errtel of Anger rank 3 | 10.00% |
| Errtel | Errtel of Blessing rank 2 | 10.00% |
| Errtel | Errtel of Blessing rank 3 | 10.00% |
| Errtel | Errtel of Divinity rank 2 | 10.00% |
| Errtel | Errtel of Divinity rank 3 | 10.00% |
| Errtel | Errtel of Integrity rank 2 | 10.00% |
| Errtel | Errtel of Integrity rank 3 | 10.00% |
| Errtel | Errtel of Radiance rank 2 | 10.00% |
| Errtel | Errtel of Radiance rank 3 | 10.00% |
| Bonus roll | Jewel of Bless x3 | 14.00% |
| Bonus roll | Jewel of Chaos x3 | 14.00% |
| Bonus roll | Jewel of Soul x3 | 14.00% |
| Bonus roll | Jewel of Guardian x1 | 12.50% |
| Bonus roll | Jewel of Harmony x1 | 12.50% |
| Bonus roll | Greater Volt Jewel (Additional) | 2.50% |
| Bonus roll | Greater Volt Jewel (Excellent) | 2.50% |
| Bonus roll | Jewel of Armor Excellent | 2.50% |
| Bonus roll | Jewel of Level | 2.50% |
| Bonus roll | Jewel of Luck | 2.50% |
| Bonus roll | Jewel of Skill | 2.50% |
| Bonus roll | Jewel of Socket | 2.50% |
| Bonus roll | Jewel of Weapon Excellent | 2.50% |
| Bonus roll | Supreme Volt Jewel (Additional) | 2.50% |
| Bonus roll | Supreme Volt Jewel (Excellent) | 2.50% |
| Bonus roll | Volt Jewel (Additional) | 2.50% |
| Bonus roll | Volt Jewel (Excellent) | 2.50% |
| Bonus roll | Mastery Box [Greater] | 1.00% |
| Bonus roll | Runic Pouch [Greater] | 1.00% |
| Bonus roll | Talisman of Ascension II (7 days) | 1.00% |
Silver Box
Opened from a Sealed Silver Box with a Silver Key. Every open gives three rewards, one from each roll below, plus 1,000 to 3,000 Ruud. Percentages are the chance inside that roll.
| Roll | Reward | Chance |
|---|---|---|
| Jewel stack | Jewel of Bless x5 | 20.00% |
| Jewel stack | Jewel of Chaos x5 | 20.00% |
| Jewel stack | Jewel of Creation x3 | 20.00% |
| Jewel stack | Jewel of Life x3 | 20.00% |
| Jewel stack | Jewel of Soul x5 | 20.00% |
| Errtel | Errtel of Anger rank 1 | 10.00% |
| Errtel | Errtel of Anger rank 2 | 10.00% |
| Errtel | Errtel of Blessing rank 1 | 10.00% |
| Errtel | Errtel of Blessing rank 2 | 10.00% |
| Errtel | Errtel of Divinity rank 1 | 10.00% |
| Errtel | Errtel of Divinity rank 2 | 10.00% |
| Errtel | Errtel of Integrity rank 1 | 10.00% |
| Errtel | Errtel of Integrity rank 2 | 10.00% |
| Errtel | Errtel of Radiance rank 1 | 10.00% |
| Errtel | Errtel of Radiance rank 2 | 10.00% |
| Bonus roll | Jewel of Bless x1 | 30.00% |
| Bonus roll | Jewel of Chaos x1 | 30.00% |
| Bonus roll | Jewel of Soul x1 | 30.00% |
| Bonus roll | Jewel of Armor Excellent | 1.25% |
| Bonus roll | Jewel of Level | 1.25% |
| Bonus roll | Jewel of Luck | 1.25% |
| Bonus roll | Jewel of Skill | 1.25% |
| Bonus roll | Jewel of Socket | 1.25% |
| Bonus roll | Jewel of Weapon Excellent | 1.25% |
| Bonus roll | Volt Jewel (Additional) | 1.25% |
| Bonus roll | Volt Jewel (Excellent) | 1.25% |
Guardian Capsule
Every open gives one of the following.
| Reward | Chance |
|---|---|
| Bless of Light [Greater] x5 | 40.00% |
| Elite Guardian Upgrade Stone | 20.00% |
| Guardian Elite Option Conversion Fragmen | 20.00% |
| Guardian Upgrade Stone | 20.00% |
Box of Contract
Every open gives one of the following.
| Reward | Chance |
|---|---|
| Contract of Life x1 | 11.11% |
| Contract of Mana x1 | 11.11% |
| Contract of Skill x1 | 11.11% |
| Contract of Wind x1 | 11.11% |
| Contract of Wrath x1 | 11.11% |
| [Enhance] Contract Stone of Wrath x1 | 11.11% |
| [Increase] Contract Stone of Life x1 | 11.11% |
| [Increase] Contract Stone of Mana x1 | 11.11% |
| [Increase] Contract Stone of Skill x1 | 11.11% |
Not listed here
Twenty-four boxes are left out on purpose. Thirteen use a drop-rate scale we have not confirmed against the game, seven use an older drop format with different rules, and four award currency rather than a random item. Where the maths is not certain, nothing is published rather than a number that might be wrong.
Runic Forge
Overview
Runic Forge is a permanent character enhancement system where you engrave magical runes into 39 slots, each granting a specific stat bonus. It's a long-term progression system - slots are never wiped, and each slot you fill adds a permanent passive stat to your character.
How It Works
The 39 slots are divided into 5 named Lines. Slots must be filled in order - you cannot engrave slot 5 before slots 1-4 are filled.
| Line | Slots | Name |
|---|---|---|
| 1 | 1-4 | Foundation |
| 2 | 5-9 | Precision |
| 3 | 10-17 | Resilience |
| 4 | 18-27 | Destruction |
| 5 | 28-39 | Mastery |
Engraving
To engrave a slot, you choose a Tier (1-5) which determines the Runic Essence cost, the stat pool available, and your odds of getting a high roll and a better metal.
| Tier | Runic Essence Cost | High Roll Chance |
|---|---|---|
| 1 (Iron) | 3 Runic Essence | 10% |
| 2 (Bronze) | 8 Runic Essence | 20% |
| 3 (Silver) | 20 Runic Essence | 35% |
| 4 (Gold) | 45 Runic Essence | 55% |
| 5 (Mythril) | 75 Runic Essence | 80% |
When you engrave, the metal is rolled randomly based on the tier you chose. Higher tiers bias toward better metals:
| Engrave Tier | Iron | Bronze | Silver | Gold | Mythril |
|---|---|---|---|---|---|
| 1 | 60% | 25% | 10% | 4% | 1% |
| 2 | 30% | 35% | 20% | 10% | 5% |
| 3 | 10% | 20% | 35% | 25% | 10% |
| 4 | 5% | 10% | 20% | 40% | 25% |
| 5 | 2% | 5% | 10% | 25% | 58% |
Each stat is also rolled as either a low or high value. The high roll chance matches the tier’s percentage above.
Stat Pools per Line
Each line has its own stat pool - you can’t get any stat in any line. Rarer stats within each pool have lower weight.
| Line | Stats Available | Notes |
|---|---|---|
| Foundation | Defense 42%, Max HP 42%, Attack* 8%, Magic Dmg* 8% | Flat damage is rare |
| Precision | Max SD 40%, EXP Rate 25%, Max AG 20%, Skill Dmg* 10%, Dmg Reduction* 5% | Skill Dmg and Dmg Reduction are rare |
| Resilience | Max MP 30%, Max HP 30%, Max AG 25%, HP Recovery* 15% | HP Recovery is rare |
| Destruction | Defense 44%, Max SD 44%, Phys Dmg%* 6%, Magic Dmg%* 6% | % damage stats are very rare |
| Mastery | Max HP 40%, Max SD 35%, Master EXP* 8%, Attack* 6%, Magic Dmg* 6%, Dmg Reduction* 5% | Four rare stats share 25% |
* Rare stat in that line’s pool
Rare Stats and Essence Tier
The percentages above are the odds on a Mythril engrave. A cheaper engrave keeps only part of each rare (*) stat's chance, and the common stats in that line take up the rest.
| Tier paid | Share of the rare chance | Dmg Reduction | Skill Damage | Phys or Magic Dmg % | Master EXP |
|---|---|---|---|---|---|
| Iron | 20% | 1.1% | 2.3% | 1.3% | 2.0% |
| Bronze | 40% | 2.2% | 4.4% | 2.6% | 3.8% |
| Silver | 60% | 3.2% | 6.4% | 3.8% | 5.3% |
| Gold | 80% | 4.1% | 8.2% | 4.9% | 6.7% |
| Mythril | 100% | 5.0% | 10.0% | 6.0% | 8.0% |
Forge Caps
The strongest stats have a ceiling across the whole forge, counting every slot and every Resonance bonus. Anything rolled above the ceiling still shows on its slot but stops counting.
| Stat | Maximum from the forge |
|---|---|
| Dmg Reduction | 12% |
| Skill Damage | 15% |
| Phys Damage % | 18% |
| Magic Damage % | 18% |
| Physical Damage (flat) | 150 |
| Magic Damage (flat) | 150 |
Stat Values
| Stat | Low Roll | High Roll |
|---|---|---|
| Attack | +15 | +30 |
| Magic Damage | +15 | +30 |
| Defense | +20 | +40 |
| Max HP | +200 | +500 |
| Skill Damage | +3% | +5% |
| Dmg Reduction | +3% | +6% |
| Max SD | +150 | +350 |
| EXP Rate | +3% | +6% |
| HP Recovery | +2% | +5% |
| Max MP | +100 | +250 |
| Max AG | +50 | +100 |
| Phys Damage % | +3% | +6% |
| Magic Damage % | +3% | +6% |
| Master EXP | +2% | +4% |
Reforging
You can Reforge any already-engraved slot to change its metal tier without changing the stat or value.
Reforge Cost
- 30 Runic Essence
- The stat and high/low roll are preserved - only the metal changes
- Metal is re-rolled using the same weight table, biased by the original engrave tier
Smart play: Engrave cheap (Tier 1) to unlock all 39 slots first, then Reforge the metal up later. This is usually more efficient than spending large amounts of Runic Essence on high-tier engraving directly.
Runic Resonance
When an entire Line (all slots in it) shares the same metal, it activates a Resonance bonus - a separate, additional stat grant on top of the individual slot bonuses. Resonance bonuses are significant and scale with metal quality.
Line 1 - Foundation
| Metal | Resonance Bonus |
|---|---|
| Iron | Defense +30, Max HP +200 |
| Bronze | Defense +50, Max SD +200 |
| Silver | Attack +15, Magic Dmg +15 |
| Gold | Attack +25, Magic Dmg +25 |
| Mythril | Attack +30, Magic Dmg +30 |
Line 2 - Precision
| Metal | Resonance Bonus |
|---|---|
| Iron | Max HP +300, Max AG +30 |
| Bronze | Skill Dmg +2%, Defense +40 |
| Silver | Dmg Reduction +3%, Max HP +400 |
| Gold | Phys Dmg +4%, Defense +60 |
| Mythril | Magic Dmg +4%, Max HP +600 |
Line 3 - Resilience
| Metal | Resonance Bonus |
|---|---|
| Iron | Defense +50, Max MP +150 |
| Bronze | HP Recovery +2%, Max SD +200 |
| Silver | Attack +20, Skill Dmg +3% |
| Gold | Master EXP +3%, Dmg Reduction +4% |
| Mythril | Attack +35, Phys Dmg +5% |
Line 4 - Destruction
| Metal | Resonance Bonus |
|---|---|
| Iron | Max HP +500, Max SD +300 |
| Bronze | HP Recovery +2%, Defense +40 |
| Silver | Magic Dmg +20, Skill Dmg +3% |
| Gold | Master EXP +3%, Dmg Reduction +4% |
| Mythril | Magic Dmg +35, Magic Dmg +5% |
Line 5 - Mastery
| Metal | Resonance Bonus |
|---|---|
| Iron | Defense +80, Max HP +600 |
| Bronze | Dmg Reduction +4%, Skill Dmg +3% |
| Silver | Attack +25, Magic Dmg +25 |
| Gold | Phys Dmg +4%, Magic Dmg +4% |
| Mythril | Attack +40, Magic Dmg +40 |
Tips
- A fully engraved forge (all 39 slots) with Mythril resonance on all 5 lines is the endgame goal.
- Physical DPS: prioritize Resilience and Mastery Mythril for the flat Attack and Phys Dmg % resonance bonuses.
- Magic DPS: mirror with Destruction and Mastery Mythril.
- Tanks/defense: Foundation Iron/Bronze resonance gives solid Defense and HP early.
- Reforging is cheaper in the long run than Tier 5 engraving for every slot.
Ancient Insignia
Overview
Ancient Insignia is a passive skill tree that unlocks permanently as you play. You earn Insignia XP by killing monsters and bosses, which converts into Skill Points that you spend on a 25-node talent tree. Each node gives permanent stat bonuses to your character.
XP & Points
- +1 XP per monster kill
- +5 XP per boss kill
- XP is batched every 10 seconds to reduce server load
- Total XP cap: 2,596,700
- Total point cap: 85 points
- XP is not linear - each successive point costs more XP (formula scales with points spent²)
The Skill Tree
The tree has 7 rows with 25 nodes across 3 branches: Offense, Defense, Utility.
Row 1 - Gateway
| Node | Max Level | Cost/lvl | Effect |
|---|---|---|---|
| Initiate | 3 | 1 pt | +3 Phys Dmg, +3 Magic Dmg, +3 Defense per level |
Row 2 - Branch Split
Requires: Initiate 3
| Node | Max Level | Cost/lvl | Effect |
|---|---|---|---|
| Wrath I | 4 | 1 pt | +10 Phys Dmg, +10 Magic Dmg per level |
| Shield I | 4 | 1 pt | +15 Defense per level |
| Insight I | 4 | 1 pt | +3% EXP Rate per level |
Row 3 - Specialization
| Node | Max Level | Cost/lvl | Prereq | Effect |
|---|---|---|---|---|
| Arcane Flow | 3 | 1 pt | Wrath I 4 | +12 Magic Dmg/lvl |
| Fury | 3 | 1 pt | Wrath I 4 | +12 Phys Dmg/lvl |
| Vigor | 3 | 1 pt | Shield I 4 | +150 Max HP/lvl |
| Aegis | 3 | 1 pt | Shield I 4 | +100 Max SD/lvl |
| Focus | 3 | 1 pt | Insight I 4 | +100 Max MP/lvl |
| Endurance | 3 | 1 pt | Insight I 4 | +80 Max AG/lvl |
Row 4 - Cross-Branch Capstones
| Node | Max Level | Cost/lvl | Prereq | Effect |
|---|---|---|---|---|
| Onslaught | 3 | 2 pt | Arcane Flow 3 + Fury 3 | +2% Phys Dmg mult/lvl |
| Bastion | 3 | 2 pt | Vigor 3 + Aegis 3 | +2% Defense mult/lvl |
| Harmony | 3 | 2 pt | Focus 3 + Endurance 3 | +2% Master EXP/lvl |
Row 5 - Tier 1 Capstones
| Node | Max Level | Cost/lvl | Prereq | Effect |
|---|---|---|---|---|
| Annihilator | 1 | 1 pt | Onslaught 3 + Harmony 3 | +1% Phys Dmg mult + 1% Magic Dmg mult |
| Immortal | 1 | 1 pt | Bastion 3 + Harmony 3 | +1% Defense mult + 1% Max HP mult |
Row 5 - Extensions
| Node | Max Level | Cost/lvl | Prereq | Effect |
|---|---|---|---|---|
| Bloodlust | 3 | 1 pt | Annihilator 1 | +2% Magic Dmg mult/lvl |
| Voracity | 3 | 1 pt | Annihilator 1 | +2% Max MP mult/lvl |
| Fortitude | 3 | 1 pt | Immortal 1 | +2% Max HP mult/lvl |
| Tenacity | 3 | 1 pt | Immortal 1 | +1% HP Recovery Rate/lvl |
Row 6 - Deep Nodes
| Node | Max Level | Cost/lvl | Prereq | Effect |
|---|---|---|---|---|
| Decimation | 2 | 2 pt | Bloodlust 3 | +2% Phys Dmg mult/lvl |
| Arcane Surge | 2 | 2 pt | Voracity 3 | +2% Magic Dmg mult/lvl |
| Ironclad | 2 | 2 pt | Fortitude 3 | +2% Defense mult/lvl |
| Rejuvenate | 2 | 2 pt | Tenacity 3 | +1% SD Recovery Rate/lvl |
Row 7 - Apex Capstones
| Node | Max Level | Cost/lvl | Prereq | Effect |
|---|---|---|---|---|
| Conqueror | 1 | 2 pt | Decimation 2 + Arcane Surge 2 | +3% Final Damage Increase |
| Warden | 1 | 2 pt | Ironclad 2 + Rejuvenate 2 | +3% Final Damage Decrease (taken) |
Respec
You can reset your entire skill tree at any time for Ruud. Cost scales with how many times you’ve respecced:
| Respec # | Cost |
|---|---|
| 1st | 10,000 Ruud |
| 2nd | 20,000 Ruud |
| 3rd | 30,000 Ruud |
| ... | +10,000 per respec |
| Cap | 100,000 Ruud |
Tips
- Initiate first - it’s mandatory to unlock everything else. Max it to 3 before anything.
- Max Wrath I to 4 before branching - Arcane Flow and Fury both require Wrath I 4.
- Offense path to Annihilator requires 30+ points and unlocks Conqueror, the strongest single node (+3% final damage increase).
- Defense path to Warden gives passive damage reduction - very strong for PvE/tanking.
- Harmony (Master EXP) is useful even for non-masters if you are still progressing master levels.
- The multiplier nodes (Onslaught, Bastion, Decimation, etc.) scale off your base stats - the stronger your gear, the more valuable % nodes become vs flat nodes.
- Don’t respec carelessly early - costs compound quickly toward 100,000 Ruud.